
Constructing 3D Models for Urban Environments
At MVRsimulation, we create many of our own models of buildings and other structures for use in the databases that we build for our customers to use in VRSG. This page describes the process we use to create 3D models of buildings. The images shown here are from a project in which we modeled buildings and other structures for our virtual Kismayo 3D terrain.
MVRsimulation’s Kismayo terrain is populated with hundreds of geographically specific culture models built from ground-level photographs taken on the streets of Kismayo. The culture models, based on a set of approximately 2,100 ground-level photographs of Kismayo, were built with Luxology Modo and Autodesk 3ds Max modeling tools in FBX format and then converted to MVRsimulation’s model format (HPY) using MVRsimulation’s FBX conversion tool.
You can create models to use with VRSG in any 3D modeling package that supports FBX format and allows the use of custom attribute nodes (such as the packages described above or Autodesk Maya). FBX-formatted models can be converted to MVRsimulation's model format by using the free conversion utility that is distributed with VRSG. A number of MVRsimulation-specific custom attributes (node names and properties) are supported by the FBX model converter to include node types that are needed for models used in visual simulation.
Creating the model geometry
Working with 3D modeling tools and image-editing tools, we use data such as site photographs, maps, and elevations to make a basic 3D mesh with correct proportions and scale. In some cases, our task is to create generic structures that are appropriate for the virtual site or context in which the model will reside. In other cases, our task is to replicate real-world structures using photographs of the actual given buildings, sometimes even as the model textures.
After constructing the 3D mesh of the building, we add internal walls and the floor and then cut out openings for doors and windows. At this point we can overlay reference imagery on the 3D model, making any necessary adjustments to refine this base model. When the base model is finished, we create final geometry details such as balconies, stairs, down pipes, and gutters.
Adding MVRsimulation model format features
VRSG supports several features in MVRsimulation's 3D model format. These features enhance the model's realism in a real-time context, for example:
- Switch states toggle between open and closed doors and windows.
- Level of detail (LOD) switches swap in a less detailed version of a model at a distance to improve performance.
- Animation nodes add a looping sequence to models requiring movement (such as flags and vehicle wheels).
- Material assignments determine how the surfaces of a model respond to lighting.
Photographing buildings for modeling
Textures for 3D models depend heavily upon photographs from which they are derived, either geospecific or geotypical photos. Ideally, such photographs should be perspectiveless. Perspectiveless means that the photograph was taken from an angle fully perpendicular to the subject. For efficient modeling, textures should be perspectiveless when we apply them to a model. Otherwise, removing perspective from a photograph is a labor intensive image-editing effort. Good and even lighting is also important; shadows as well as snow and dirt are aspects that obscure the normal state of the building to be modeled. (We add these environmental details after the model is built.)
In the absence of good geospecific photographs to use directly as textures, we create geotypical textures from other appropriate real-world photos obtained from online image libraries.
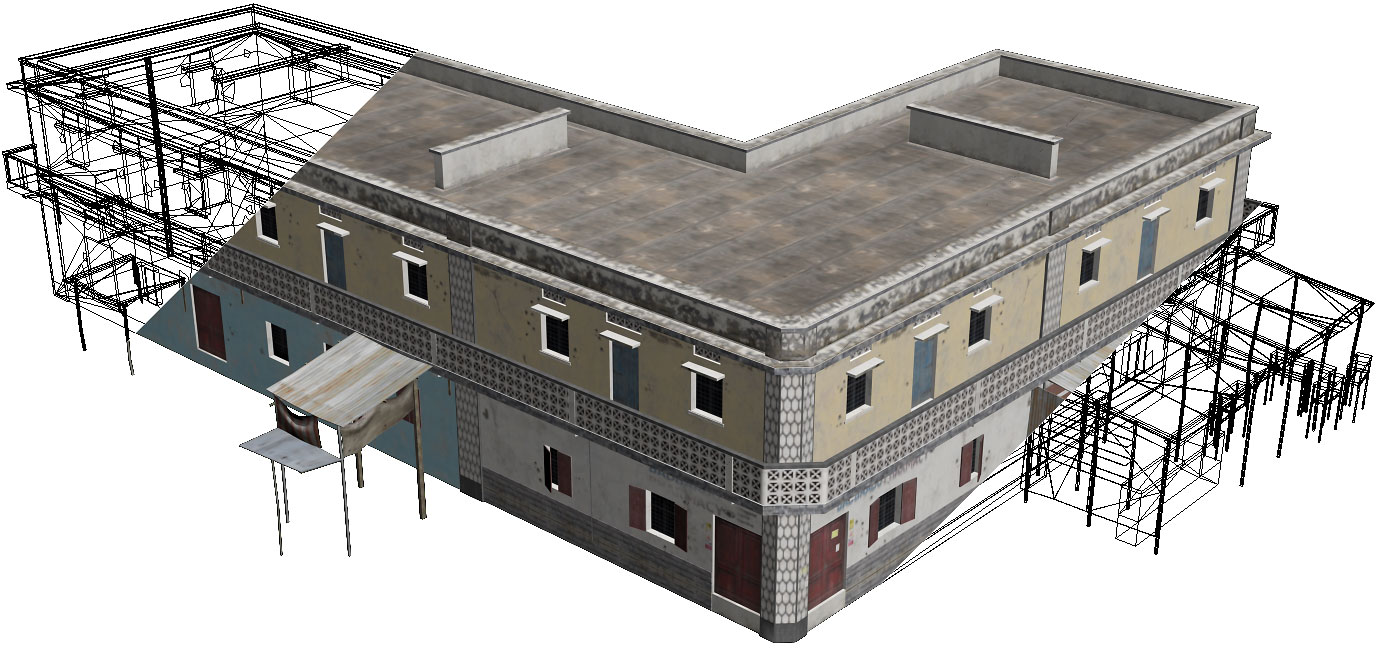
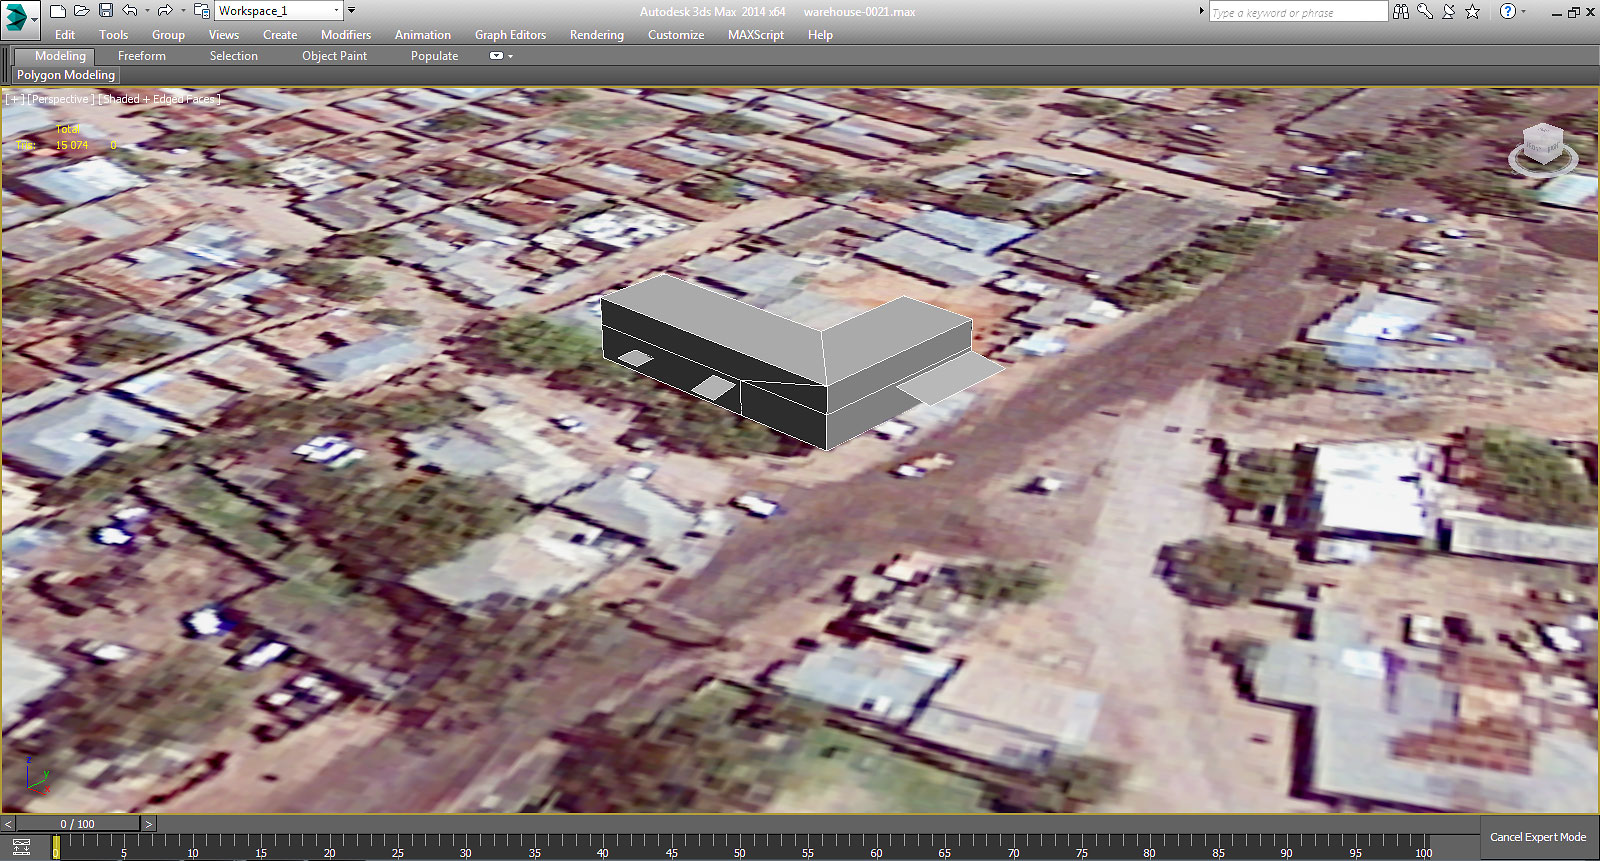
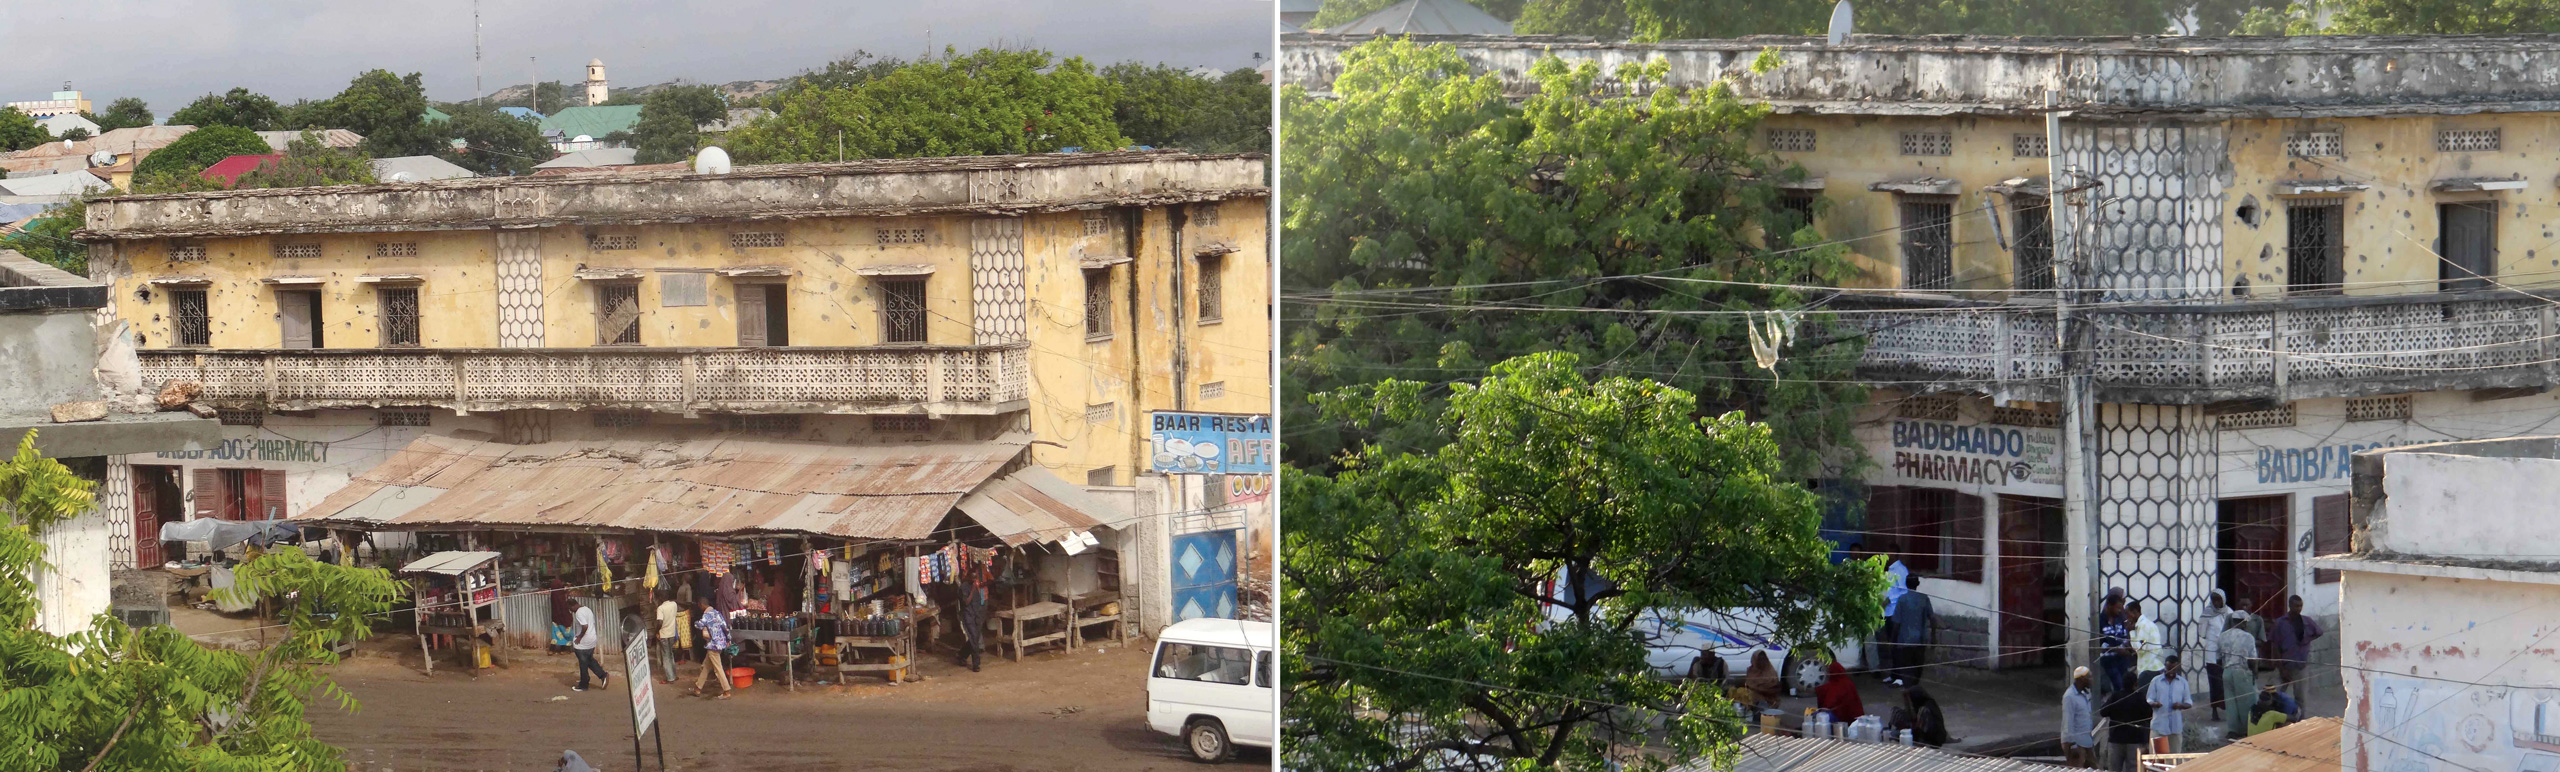
The images below are two of several Kismayo site-specific photographs we used to create the model Kismayo-warehouse-0021.
Texturing the model
Next, we apply the photographic textures to the mesh so we can see what the output will look like in VRSG. Mapping the textures onto the 3D mesh is the most complex task in creating the model because each face on the mesh must be assigned to a part of the texture. Any mismatch in scale, alignment, or tone is easily visible.
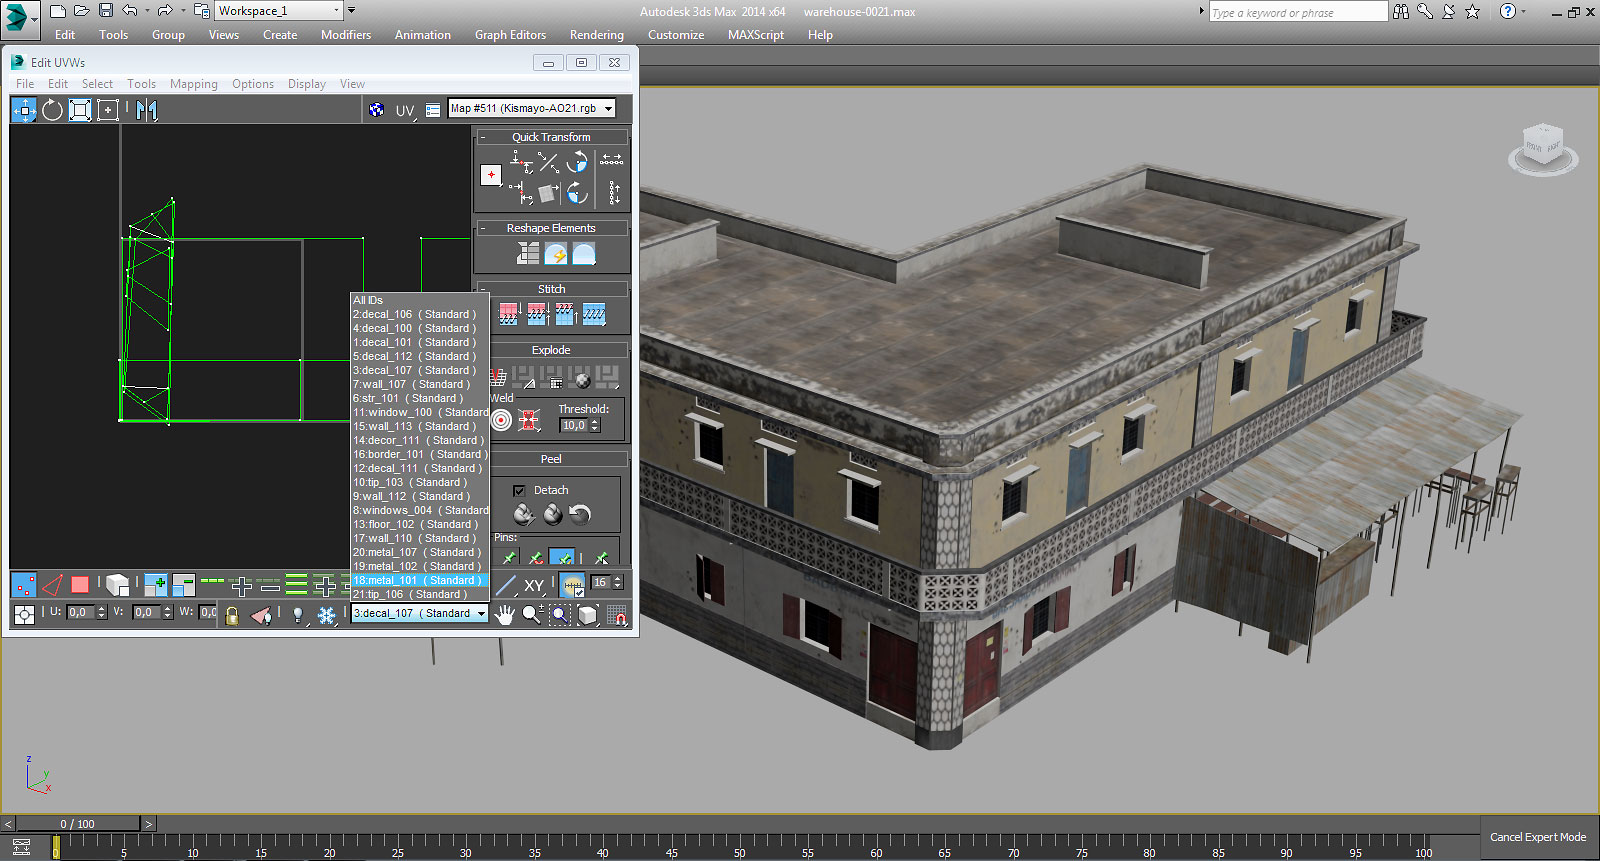
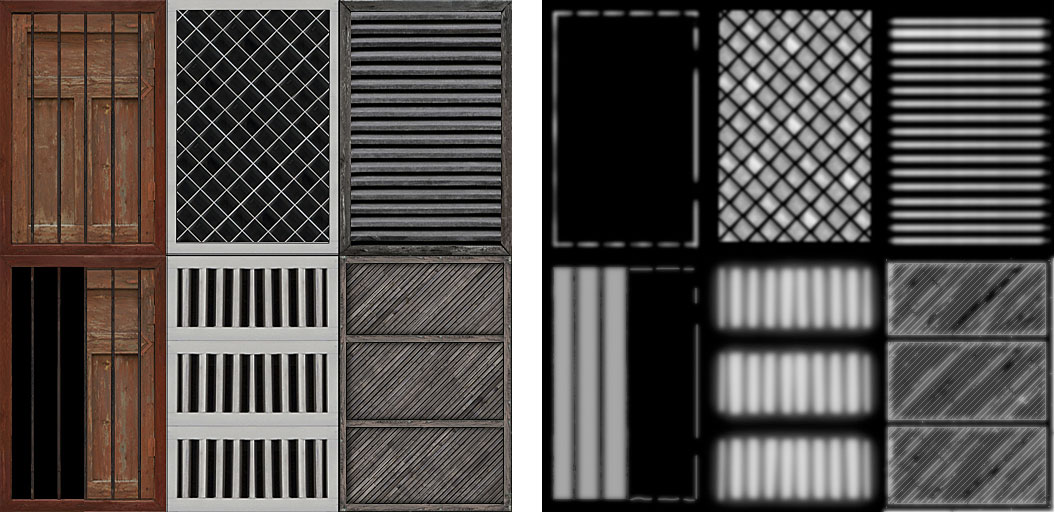
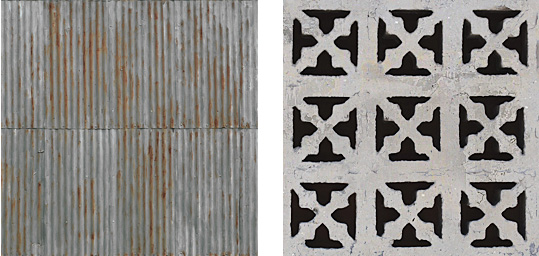
To make textures for our models, we edit the photographs by adjusting the color and removing any unwanted interference and camera distortion. We place textures for the models in one larger composite texture, in up to 2048 x 2048 pixel allotments for efficient texture paging within VRSG. Also we create night lighting textures in this step. Images of bricks, concrete, or other textures that will cover large areas, such as a wall, are edited to become tiling textures that repeat seamlessly across the area. Texture elements are tiled, or repeated, whenever possible to reduce the memory requirements for rendering the model. Such textures are useful in terms of marginal utility in that their visual content is generic; some texture elements contribute more to the model fidelity than others.
The following images are examples of a composite texture of windows, the corresponding night texture, and two tiling textures:
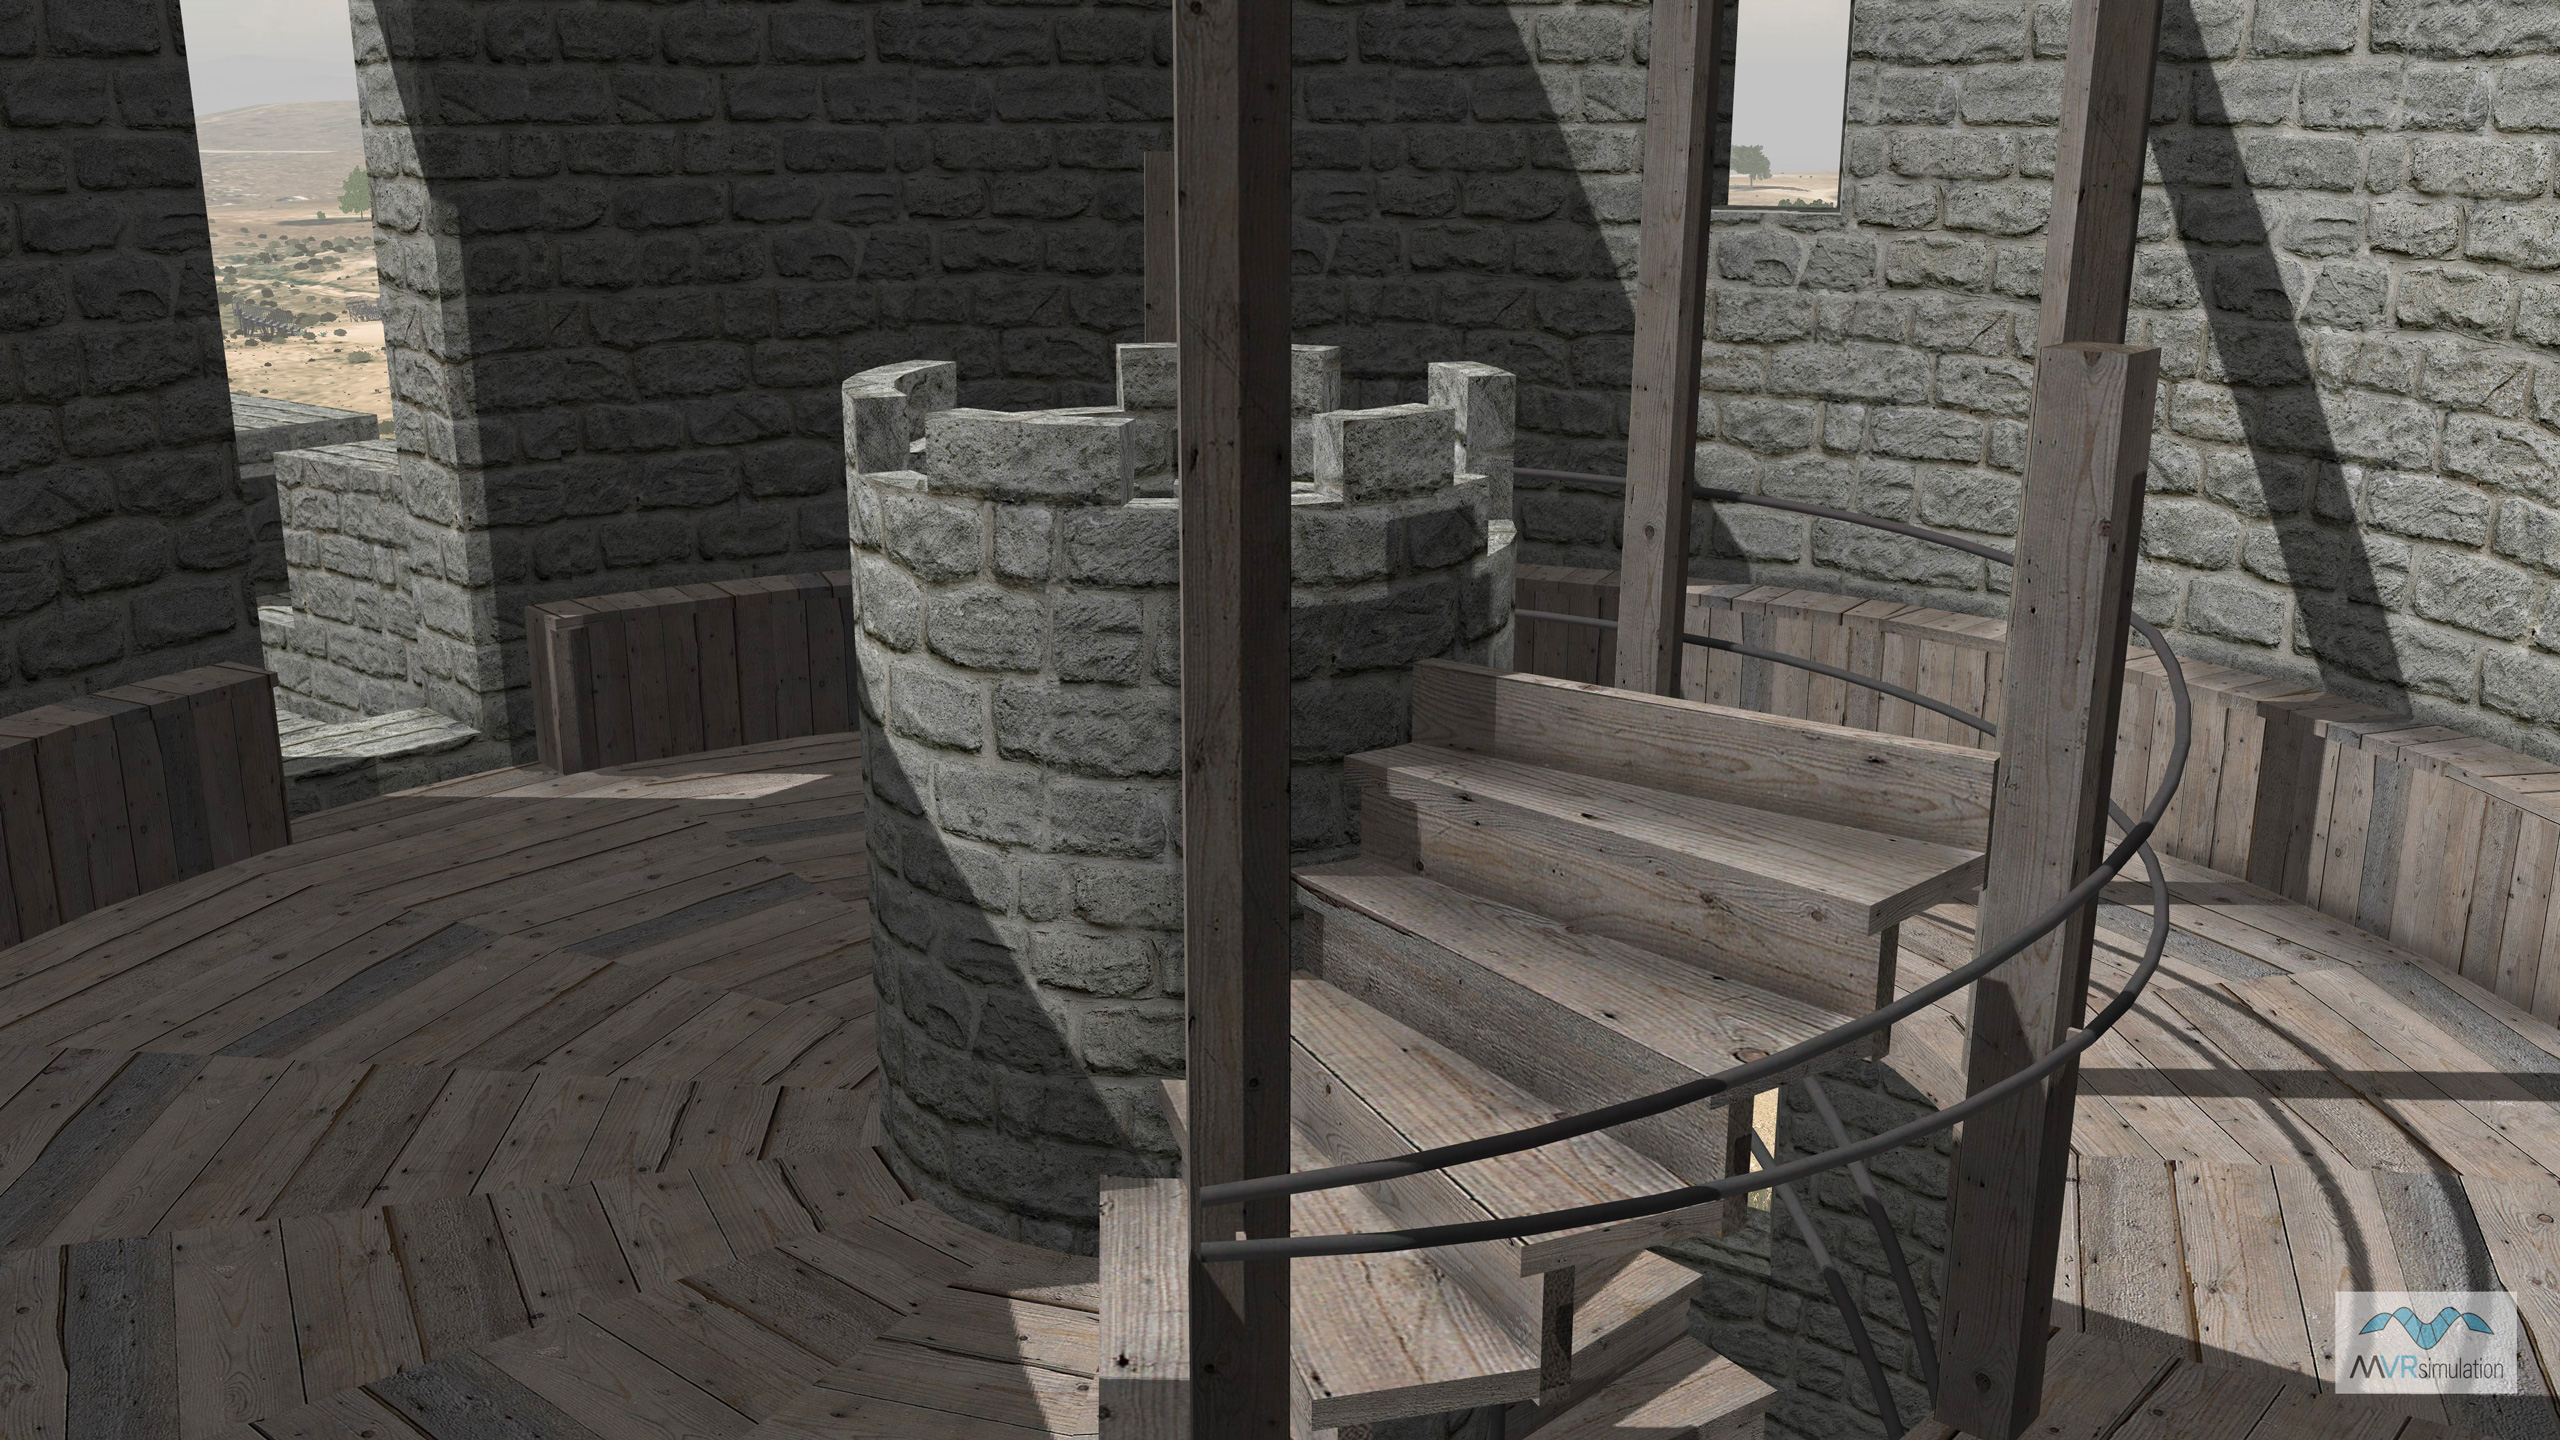
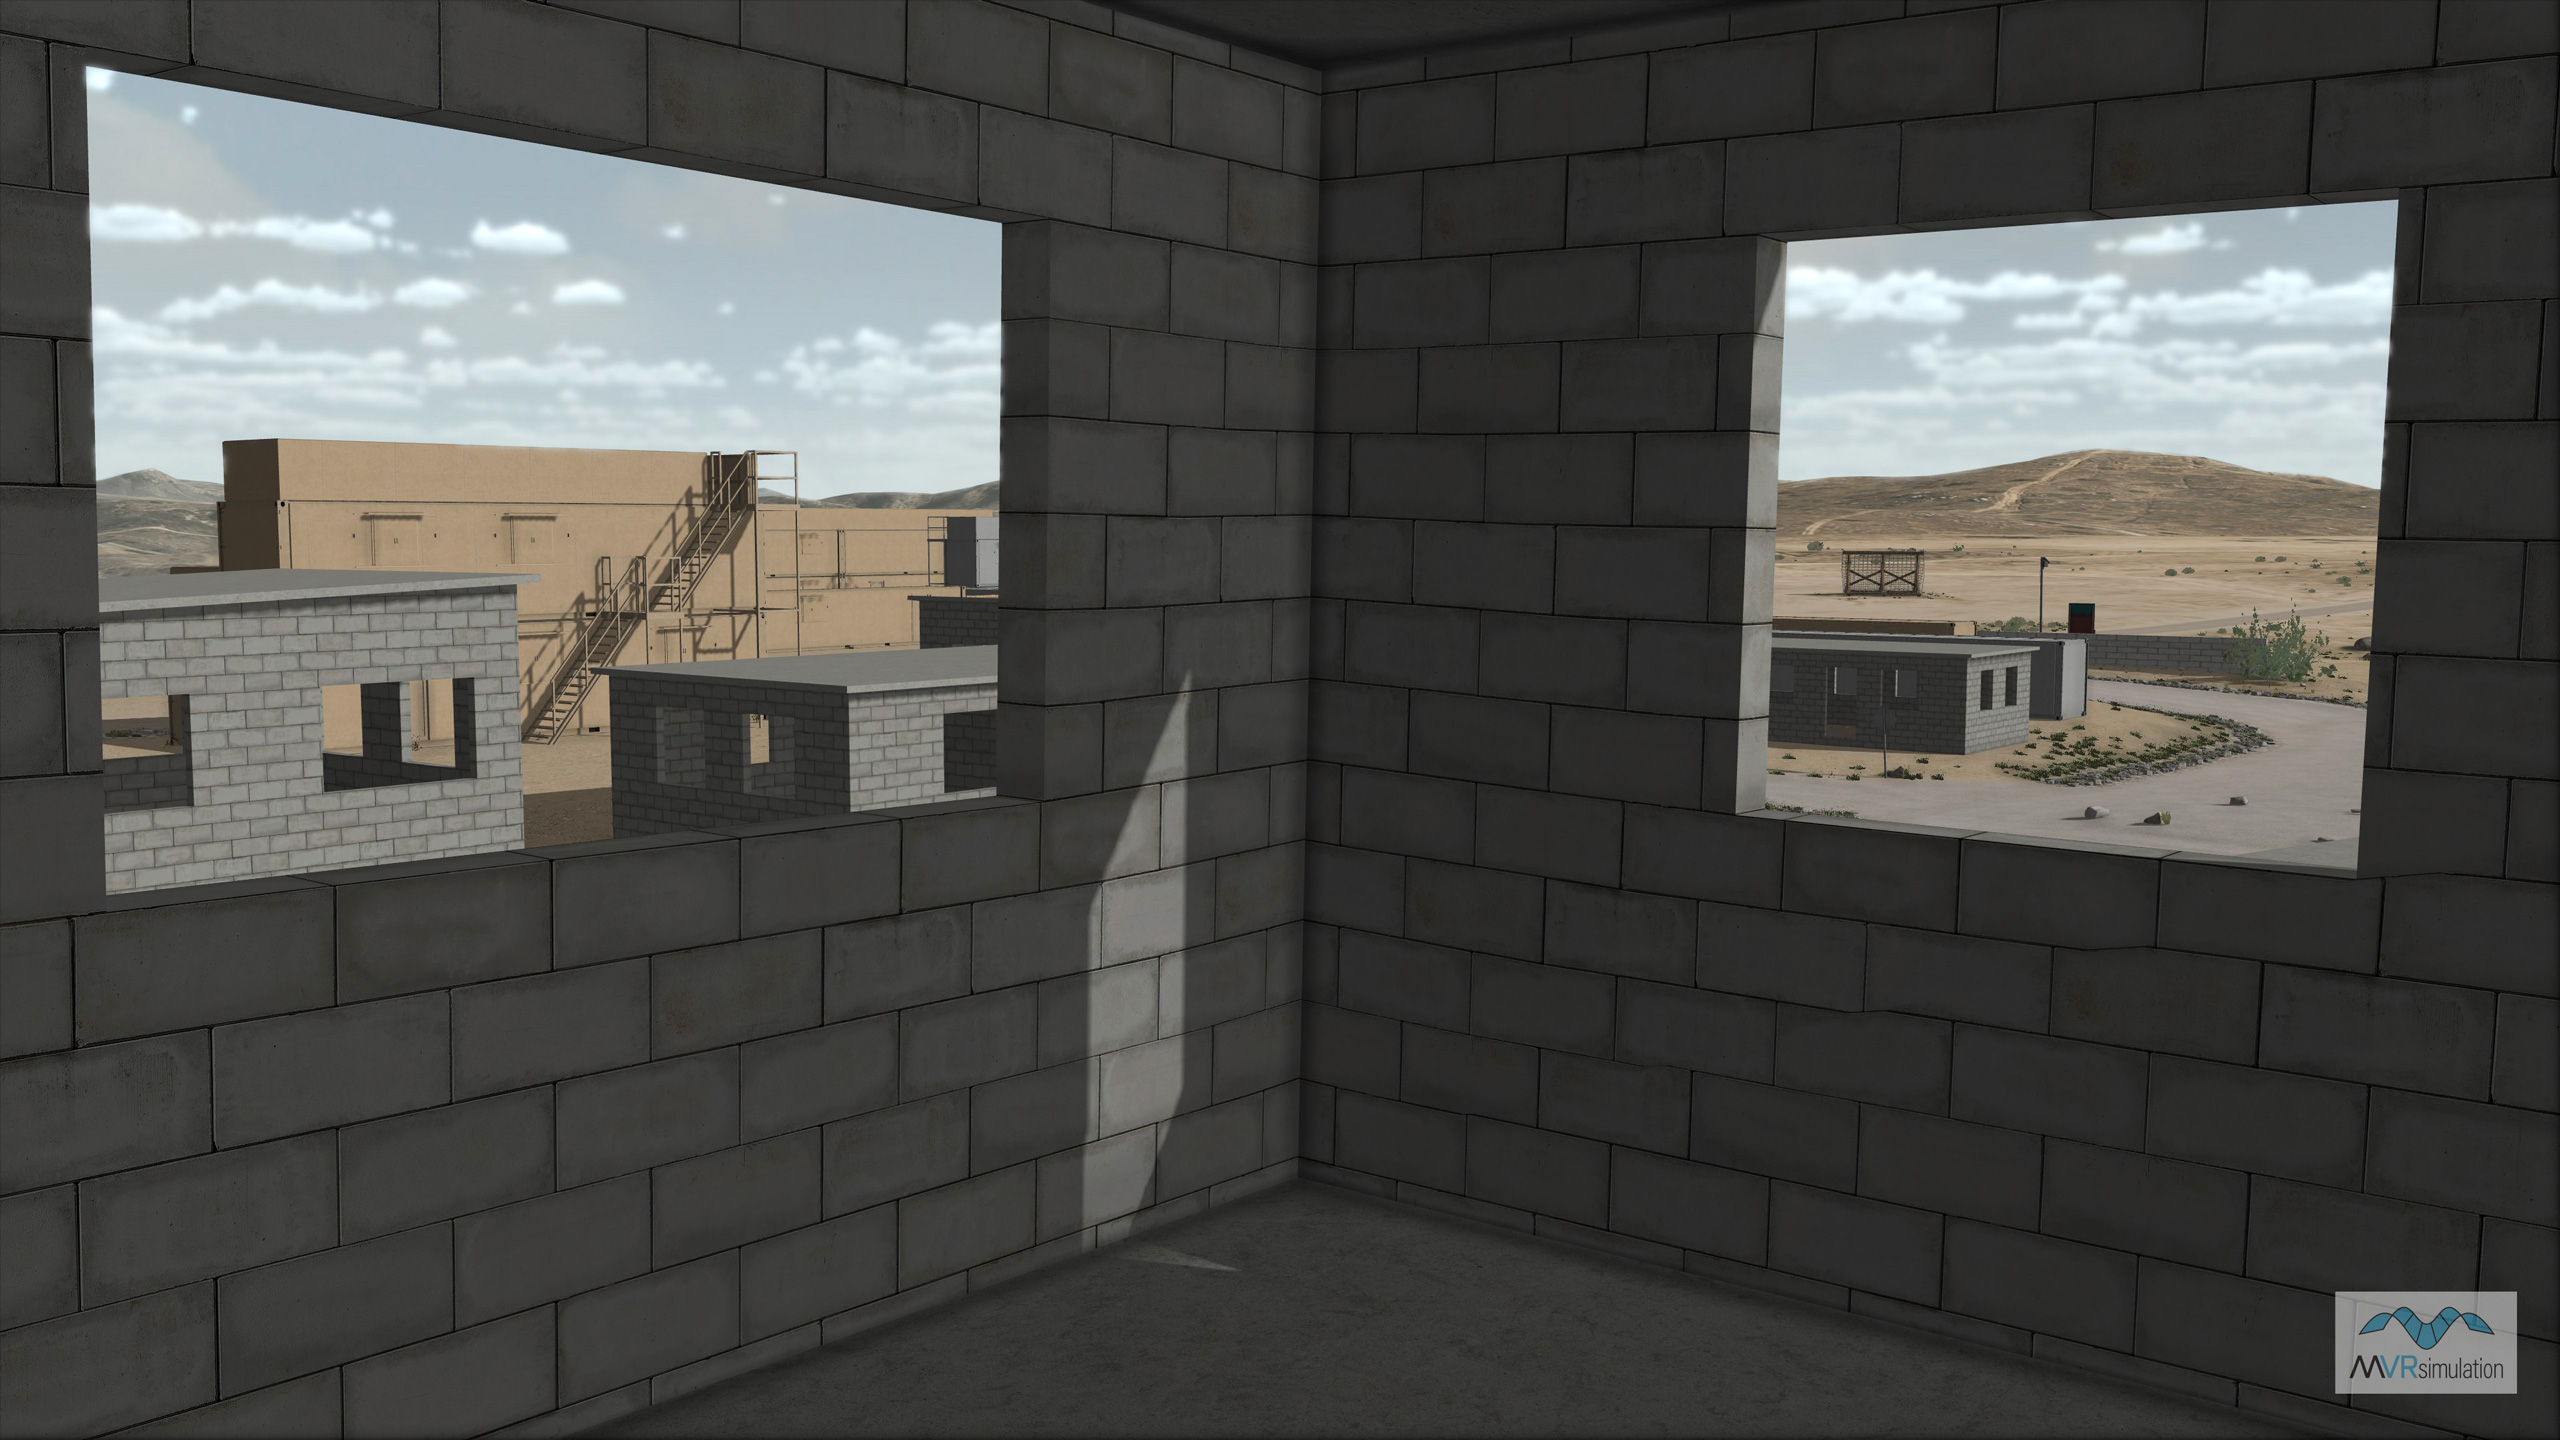
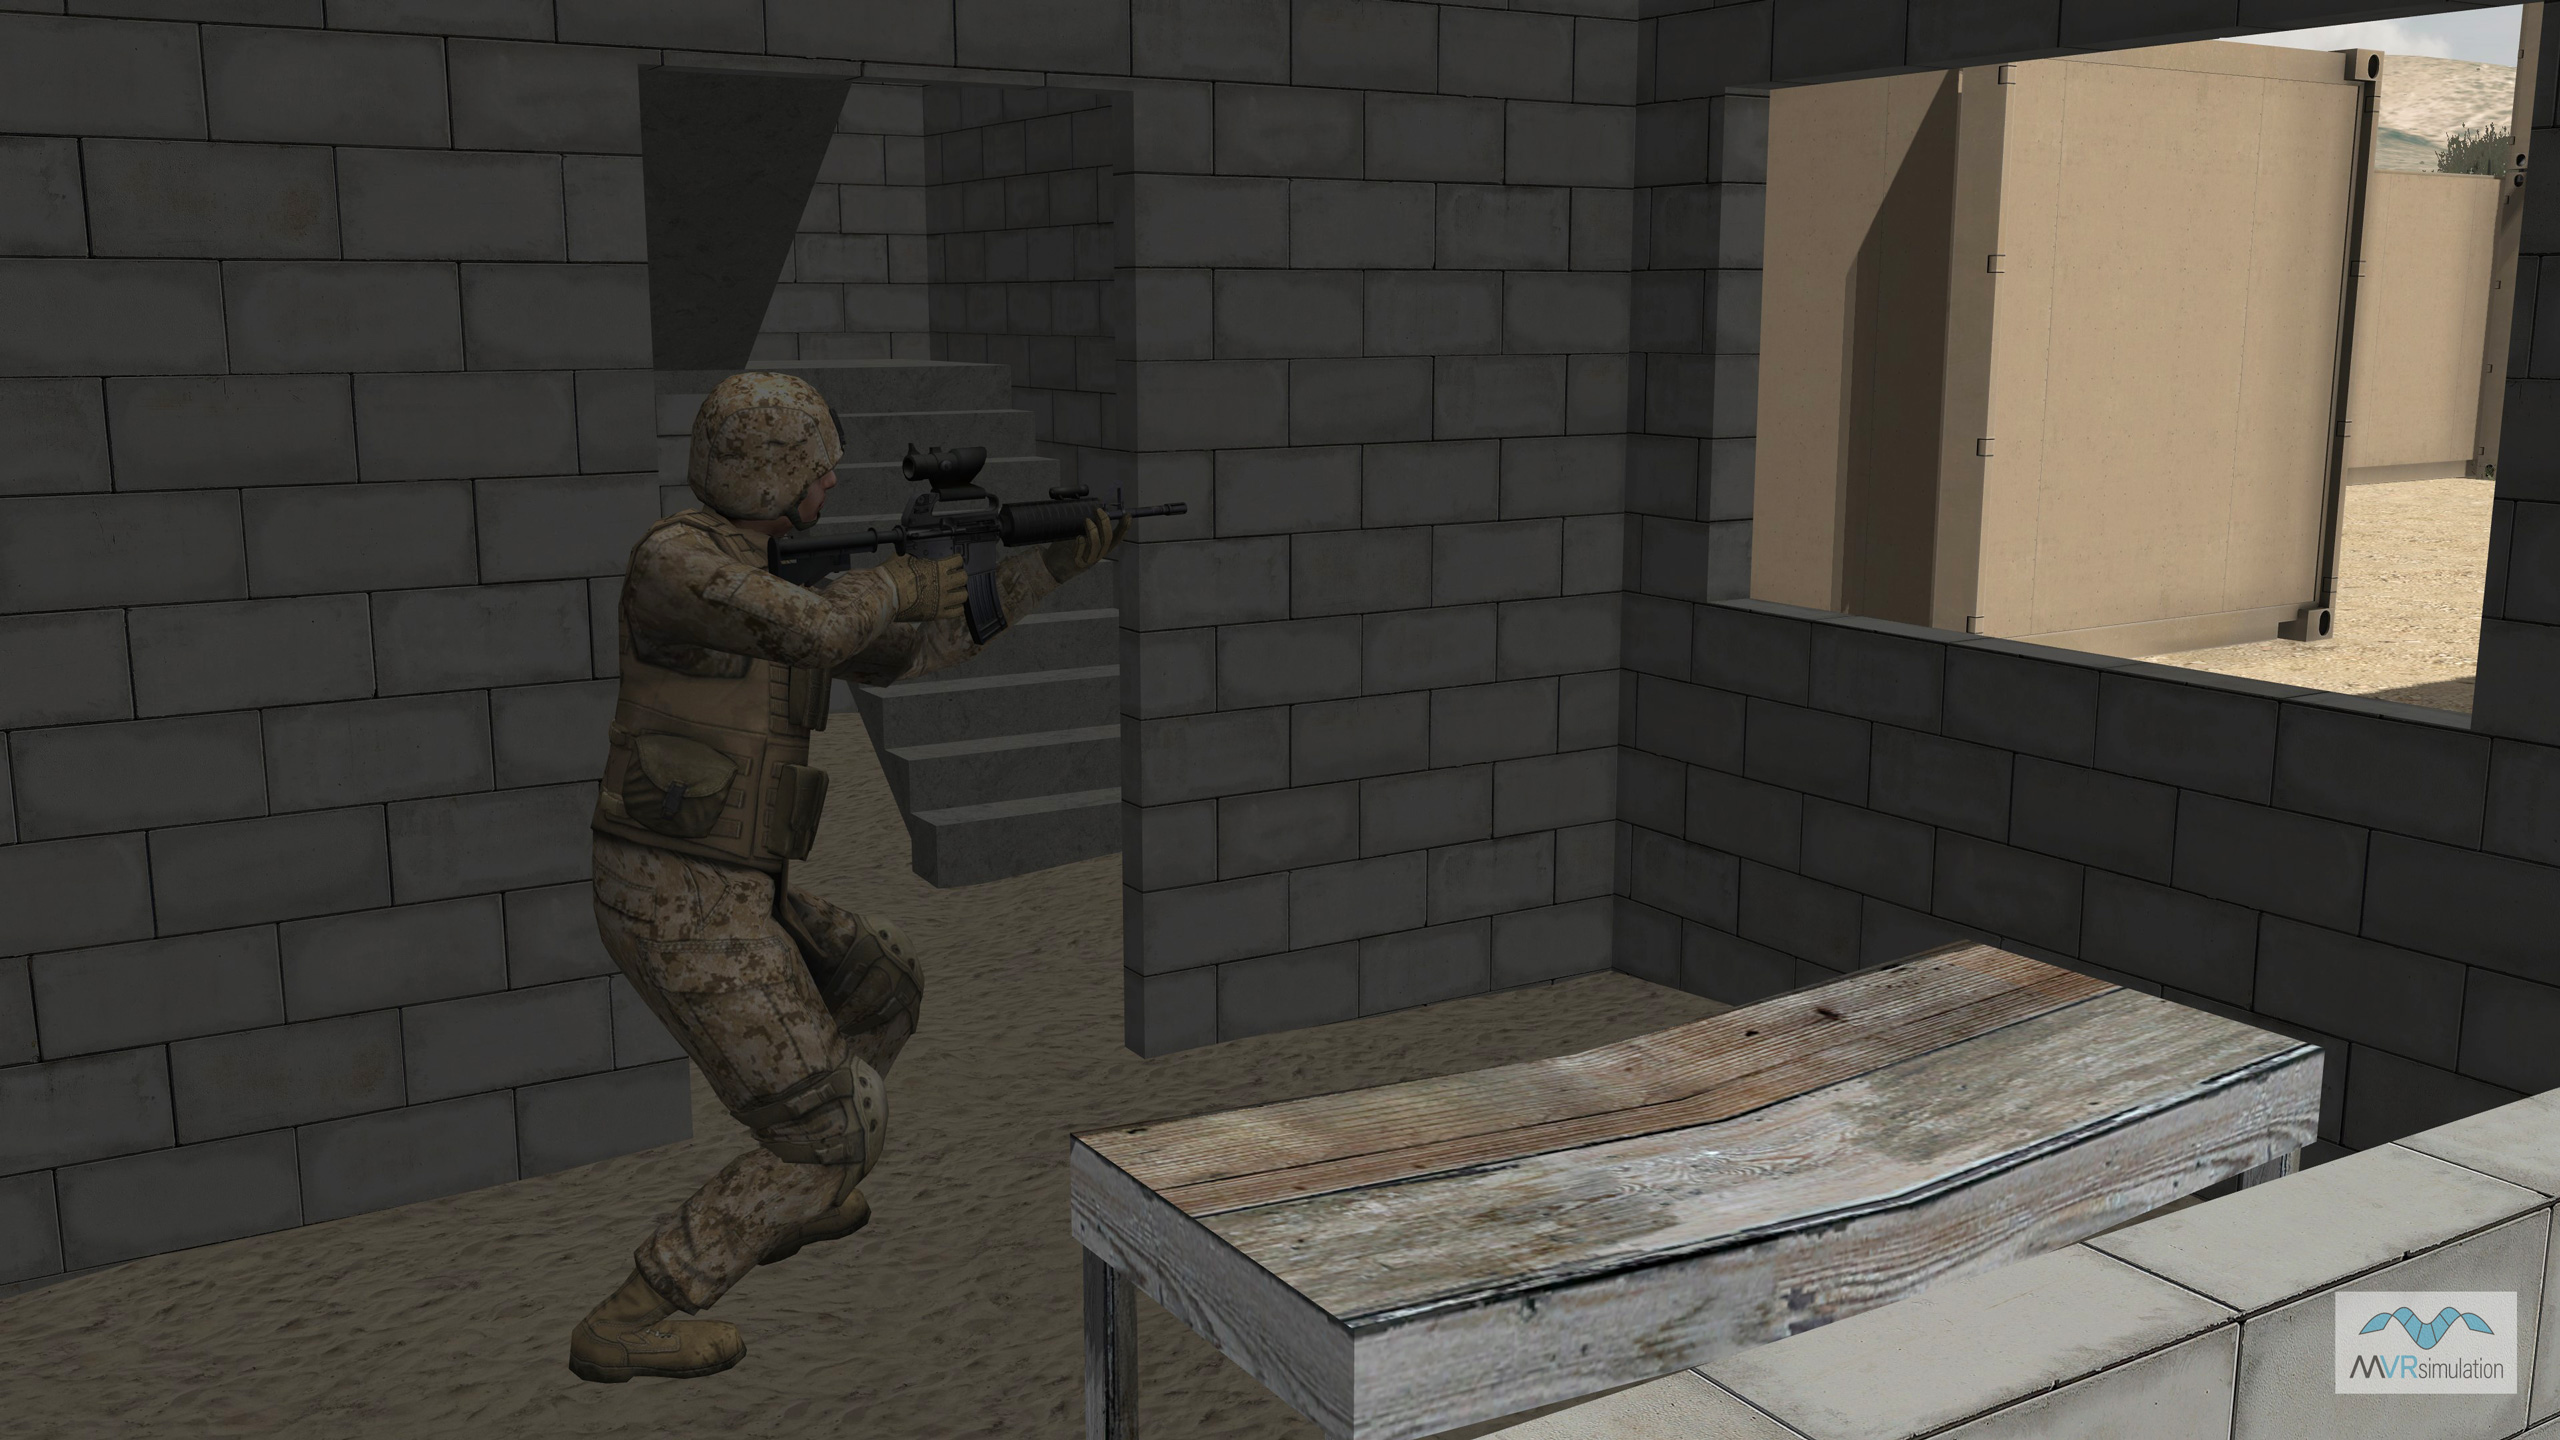
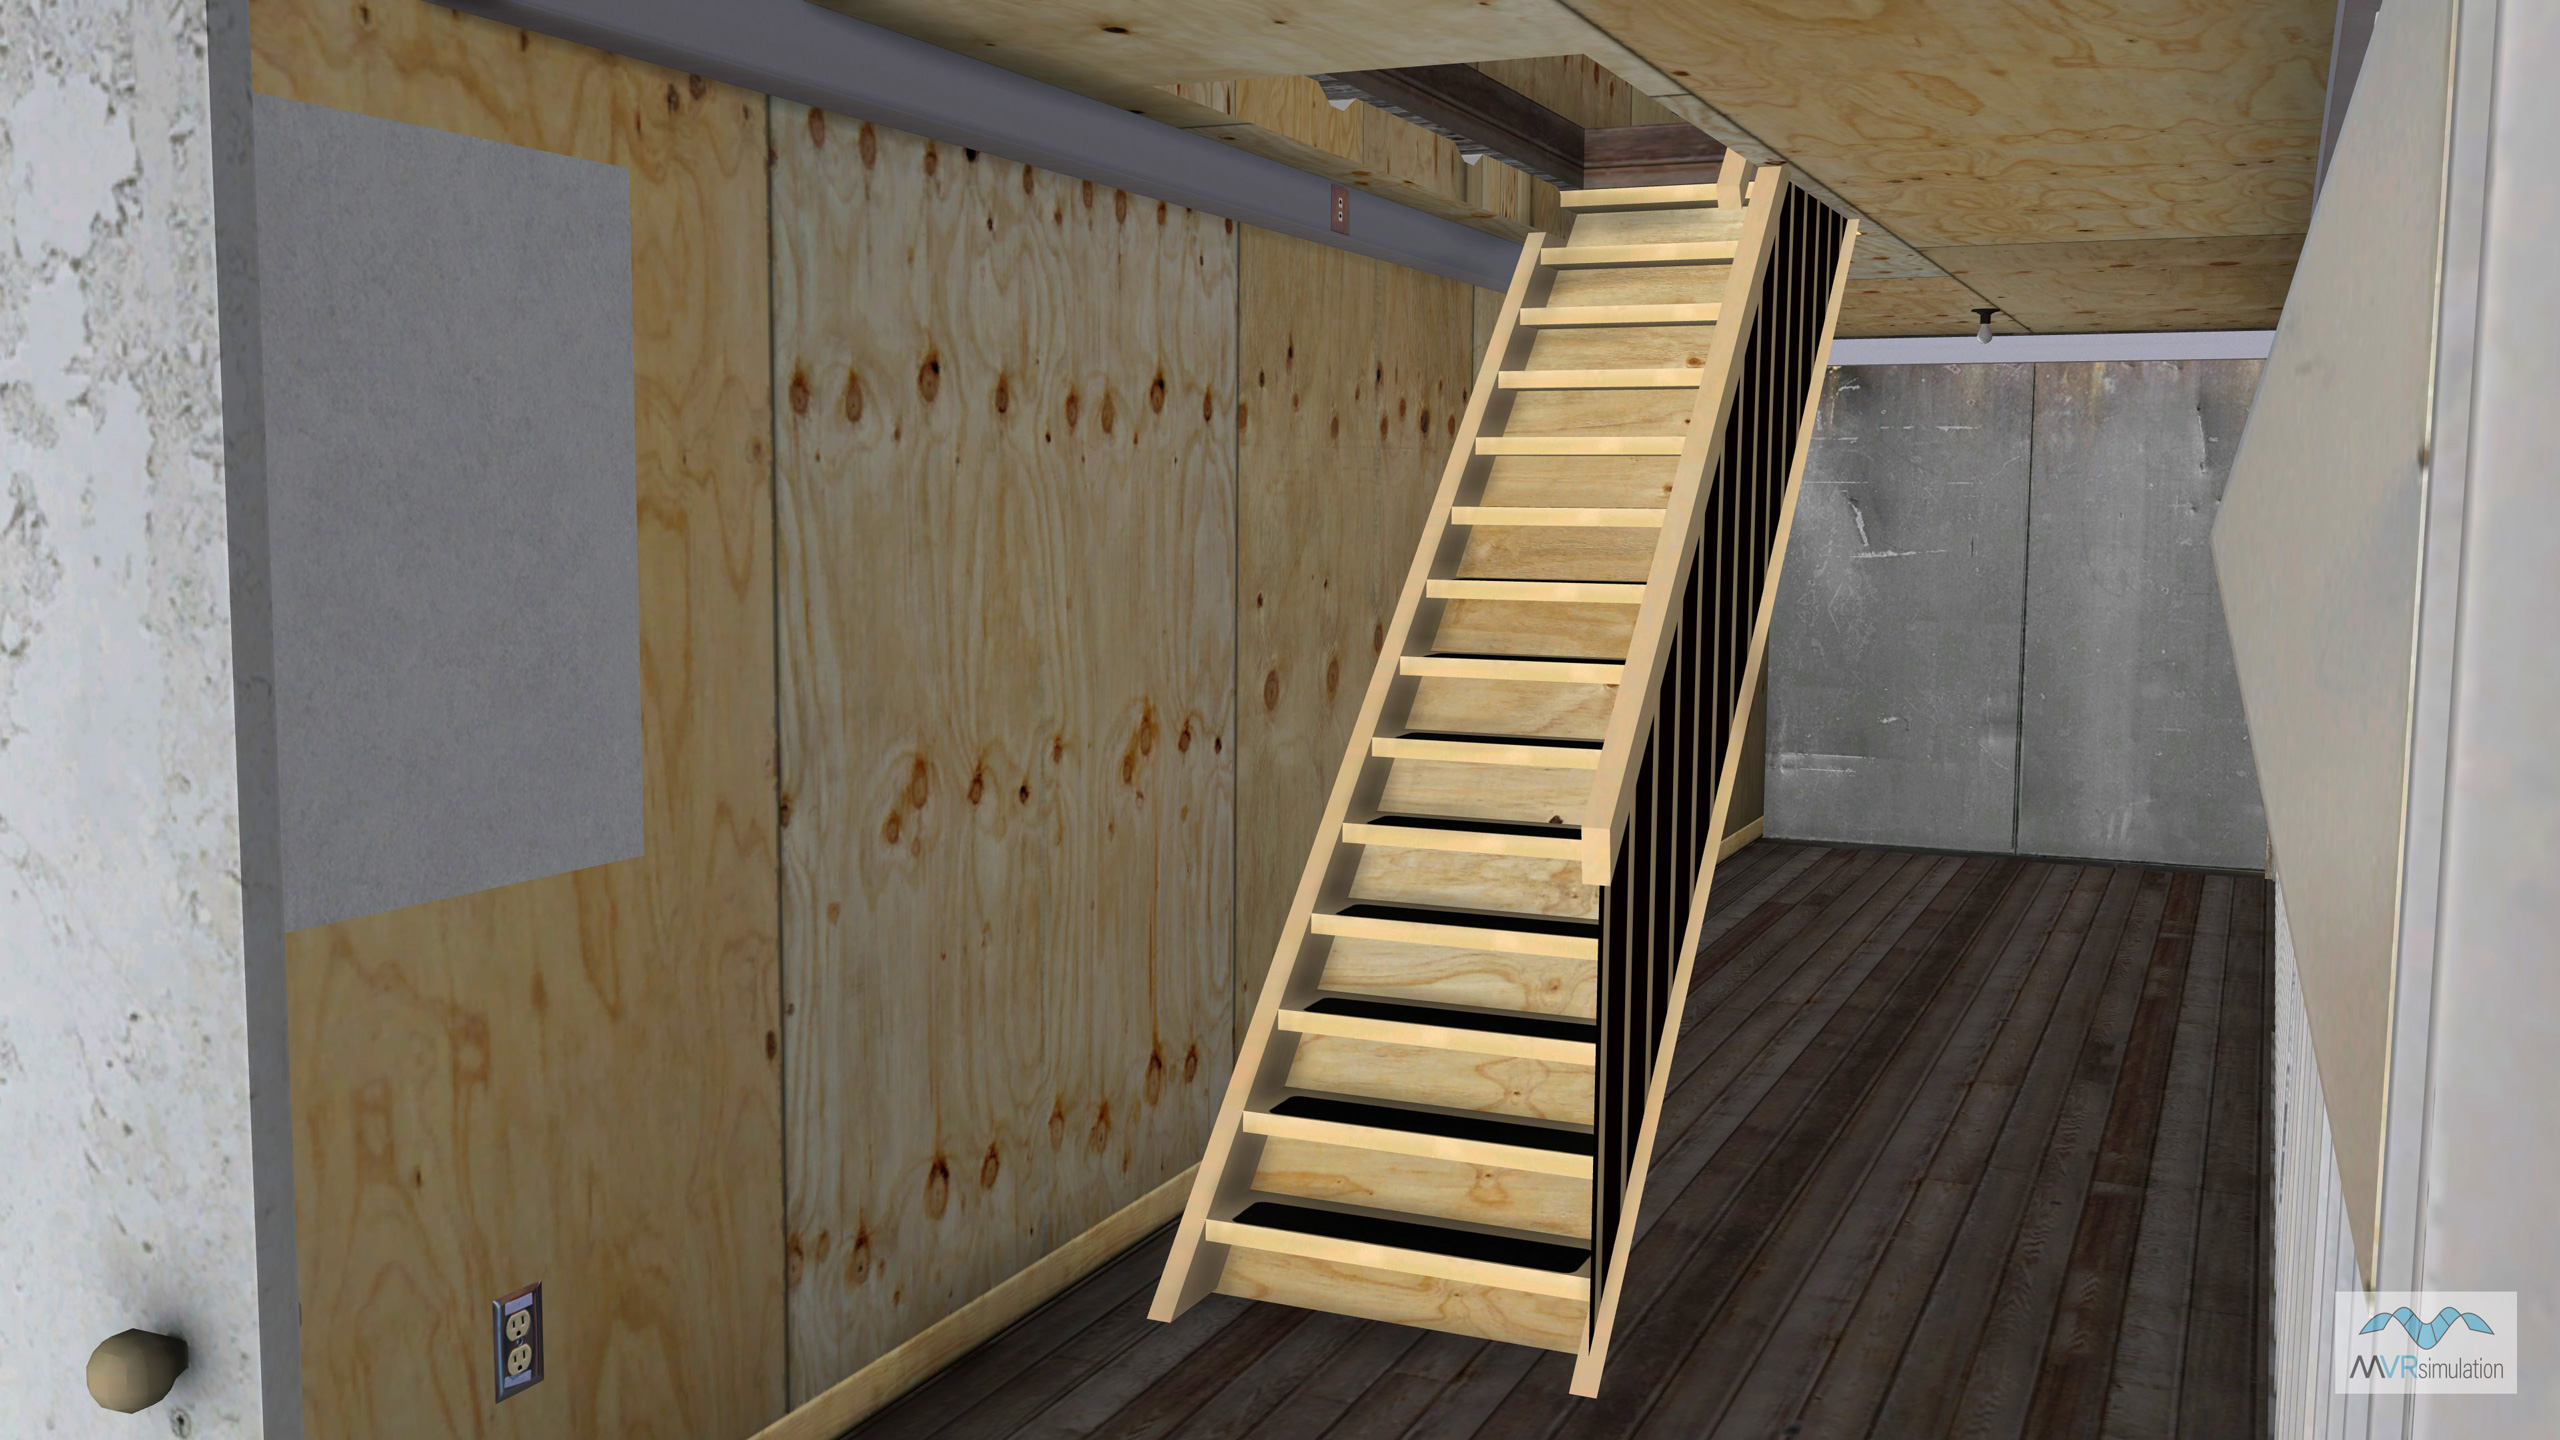
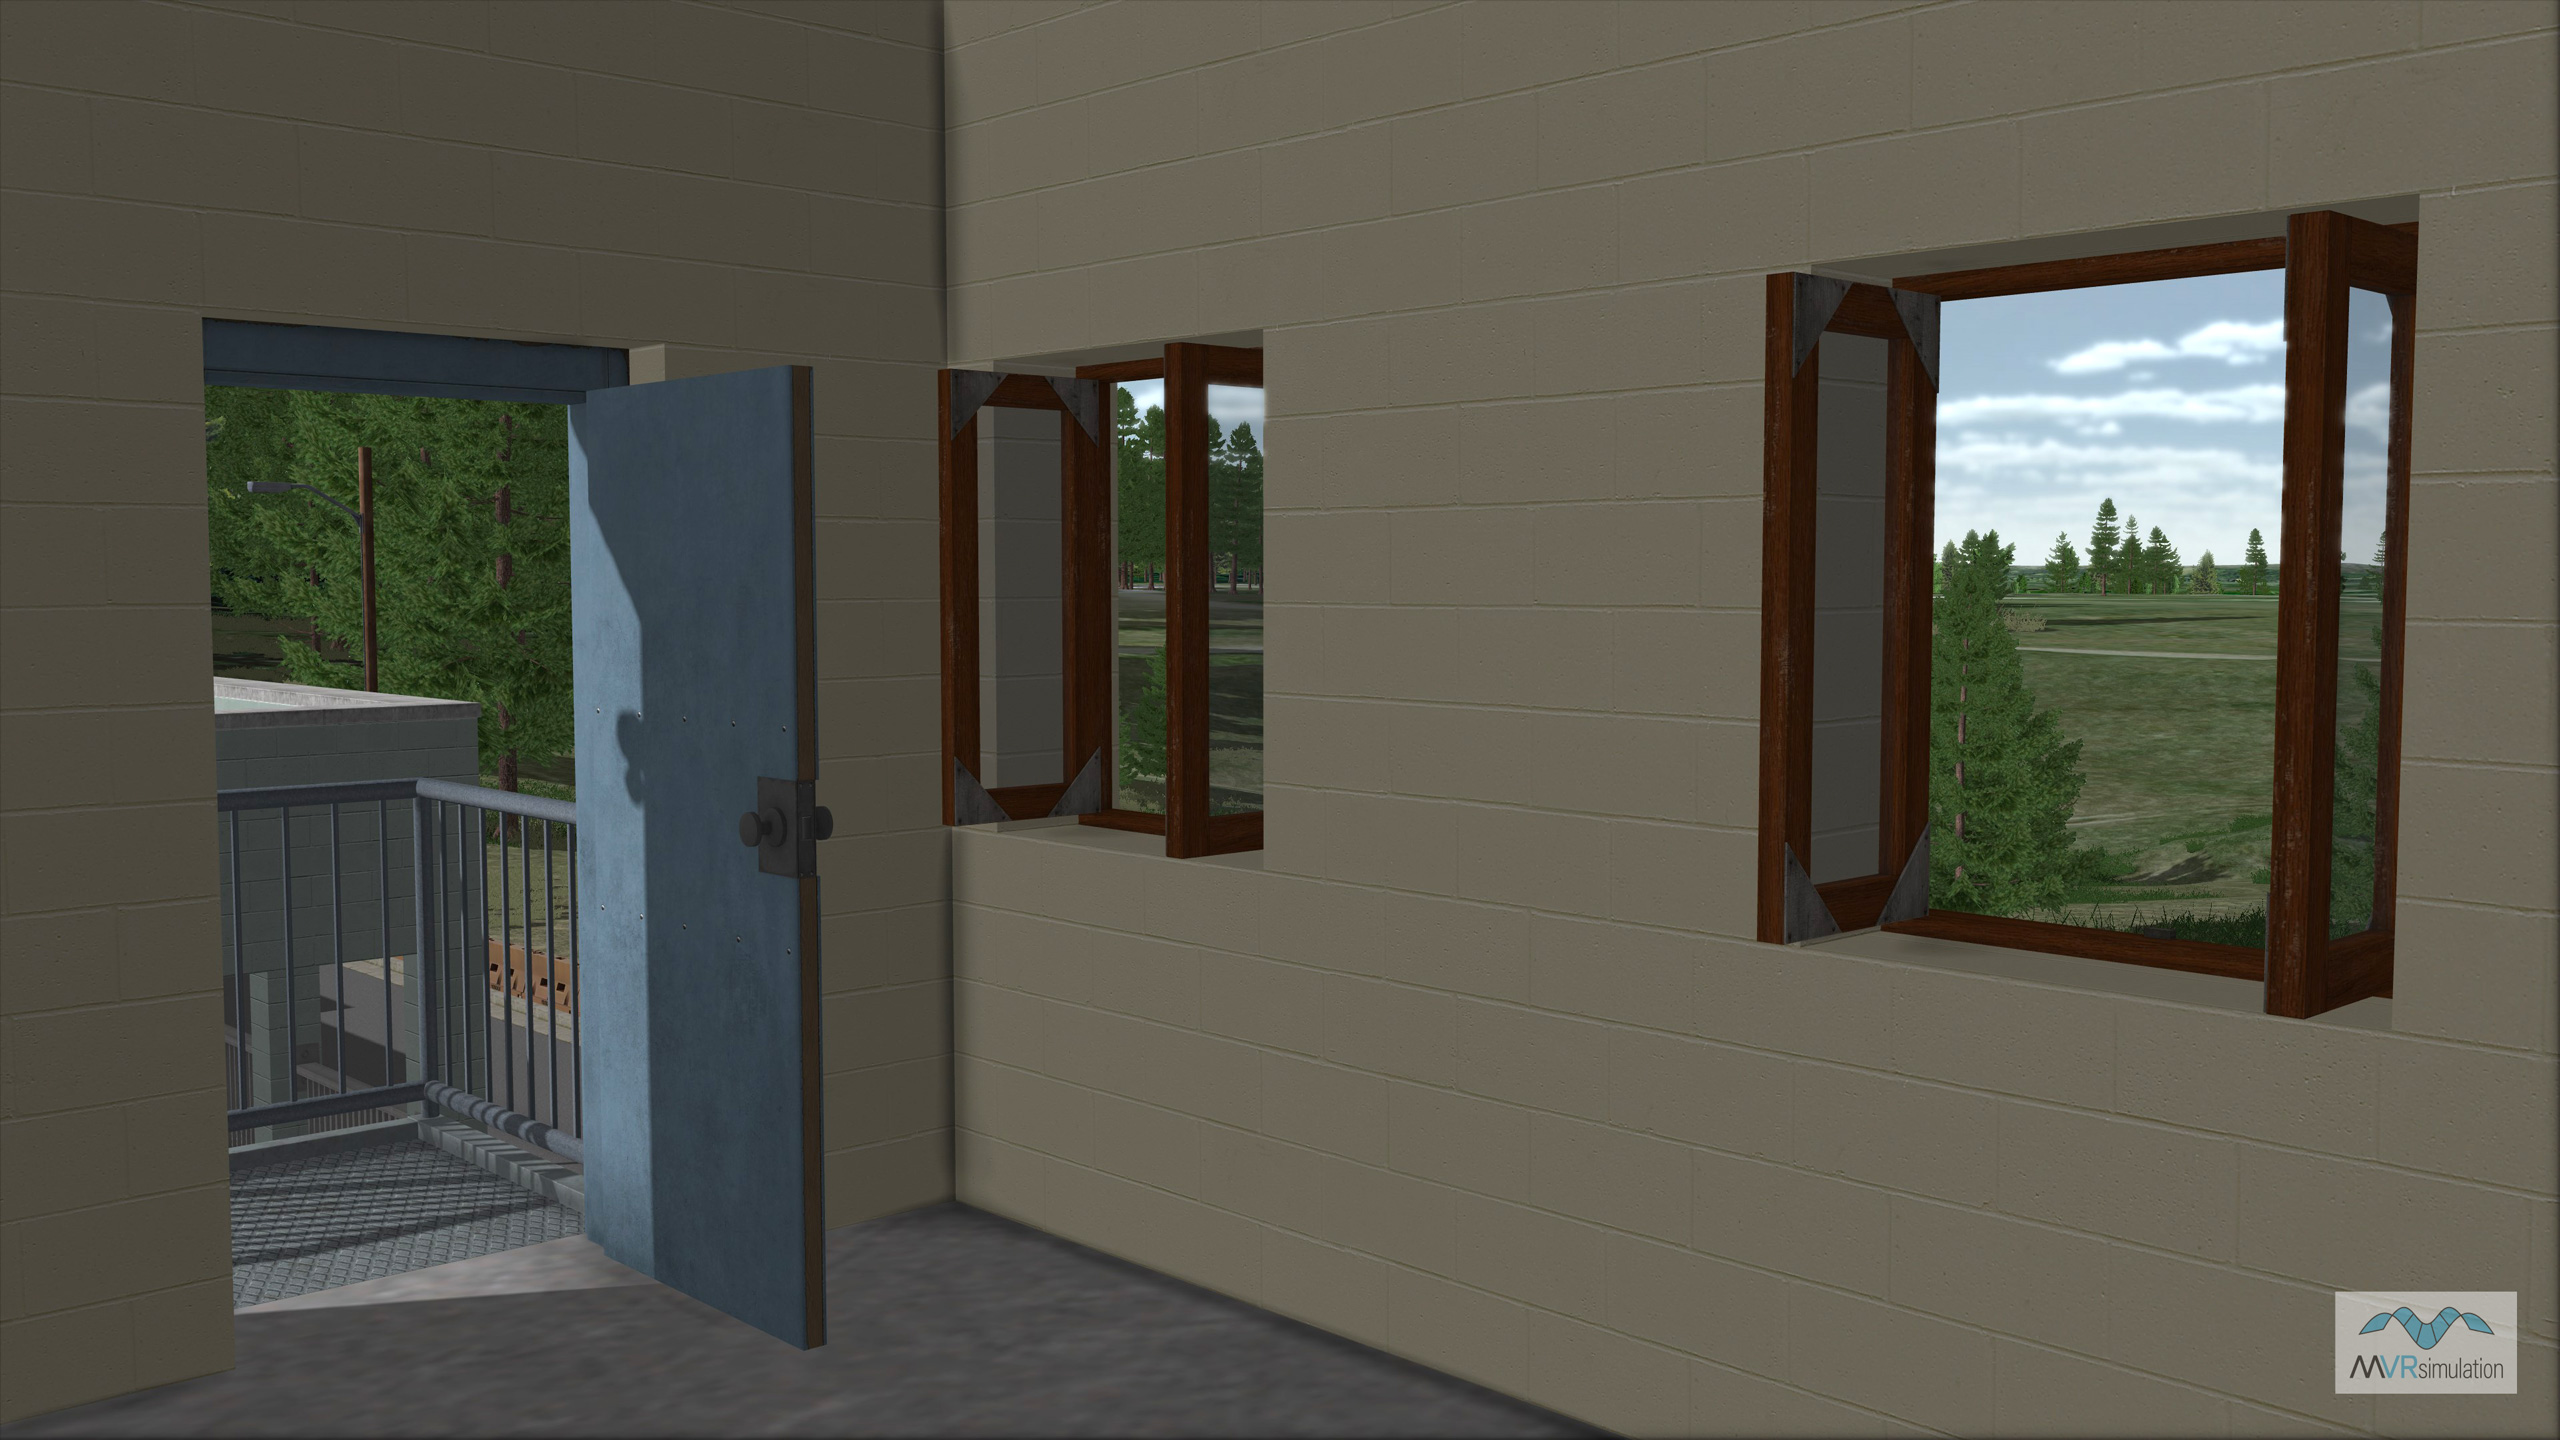
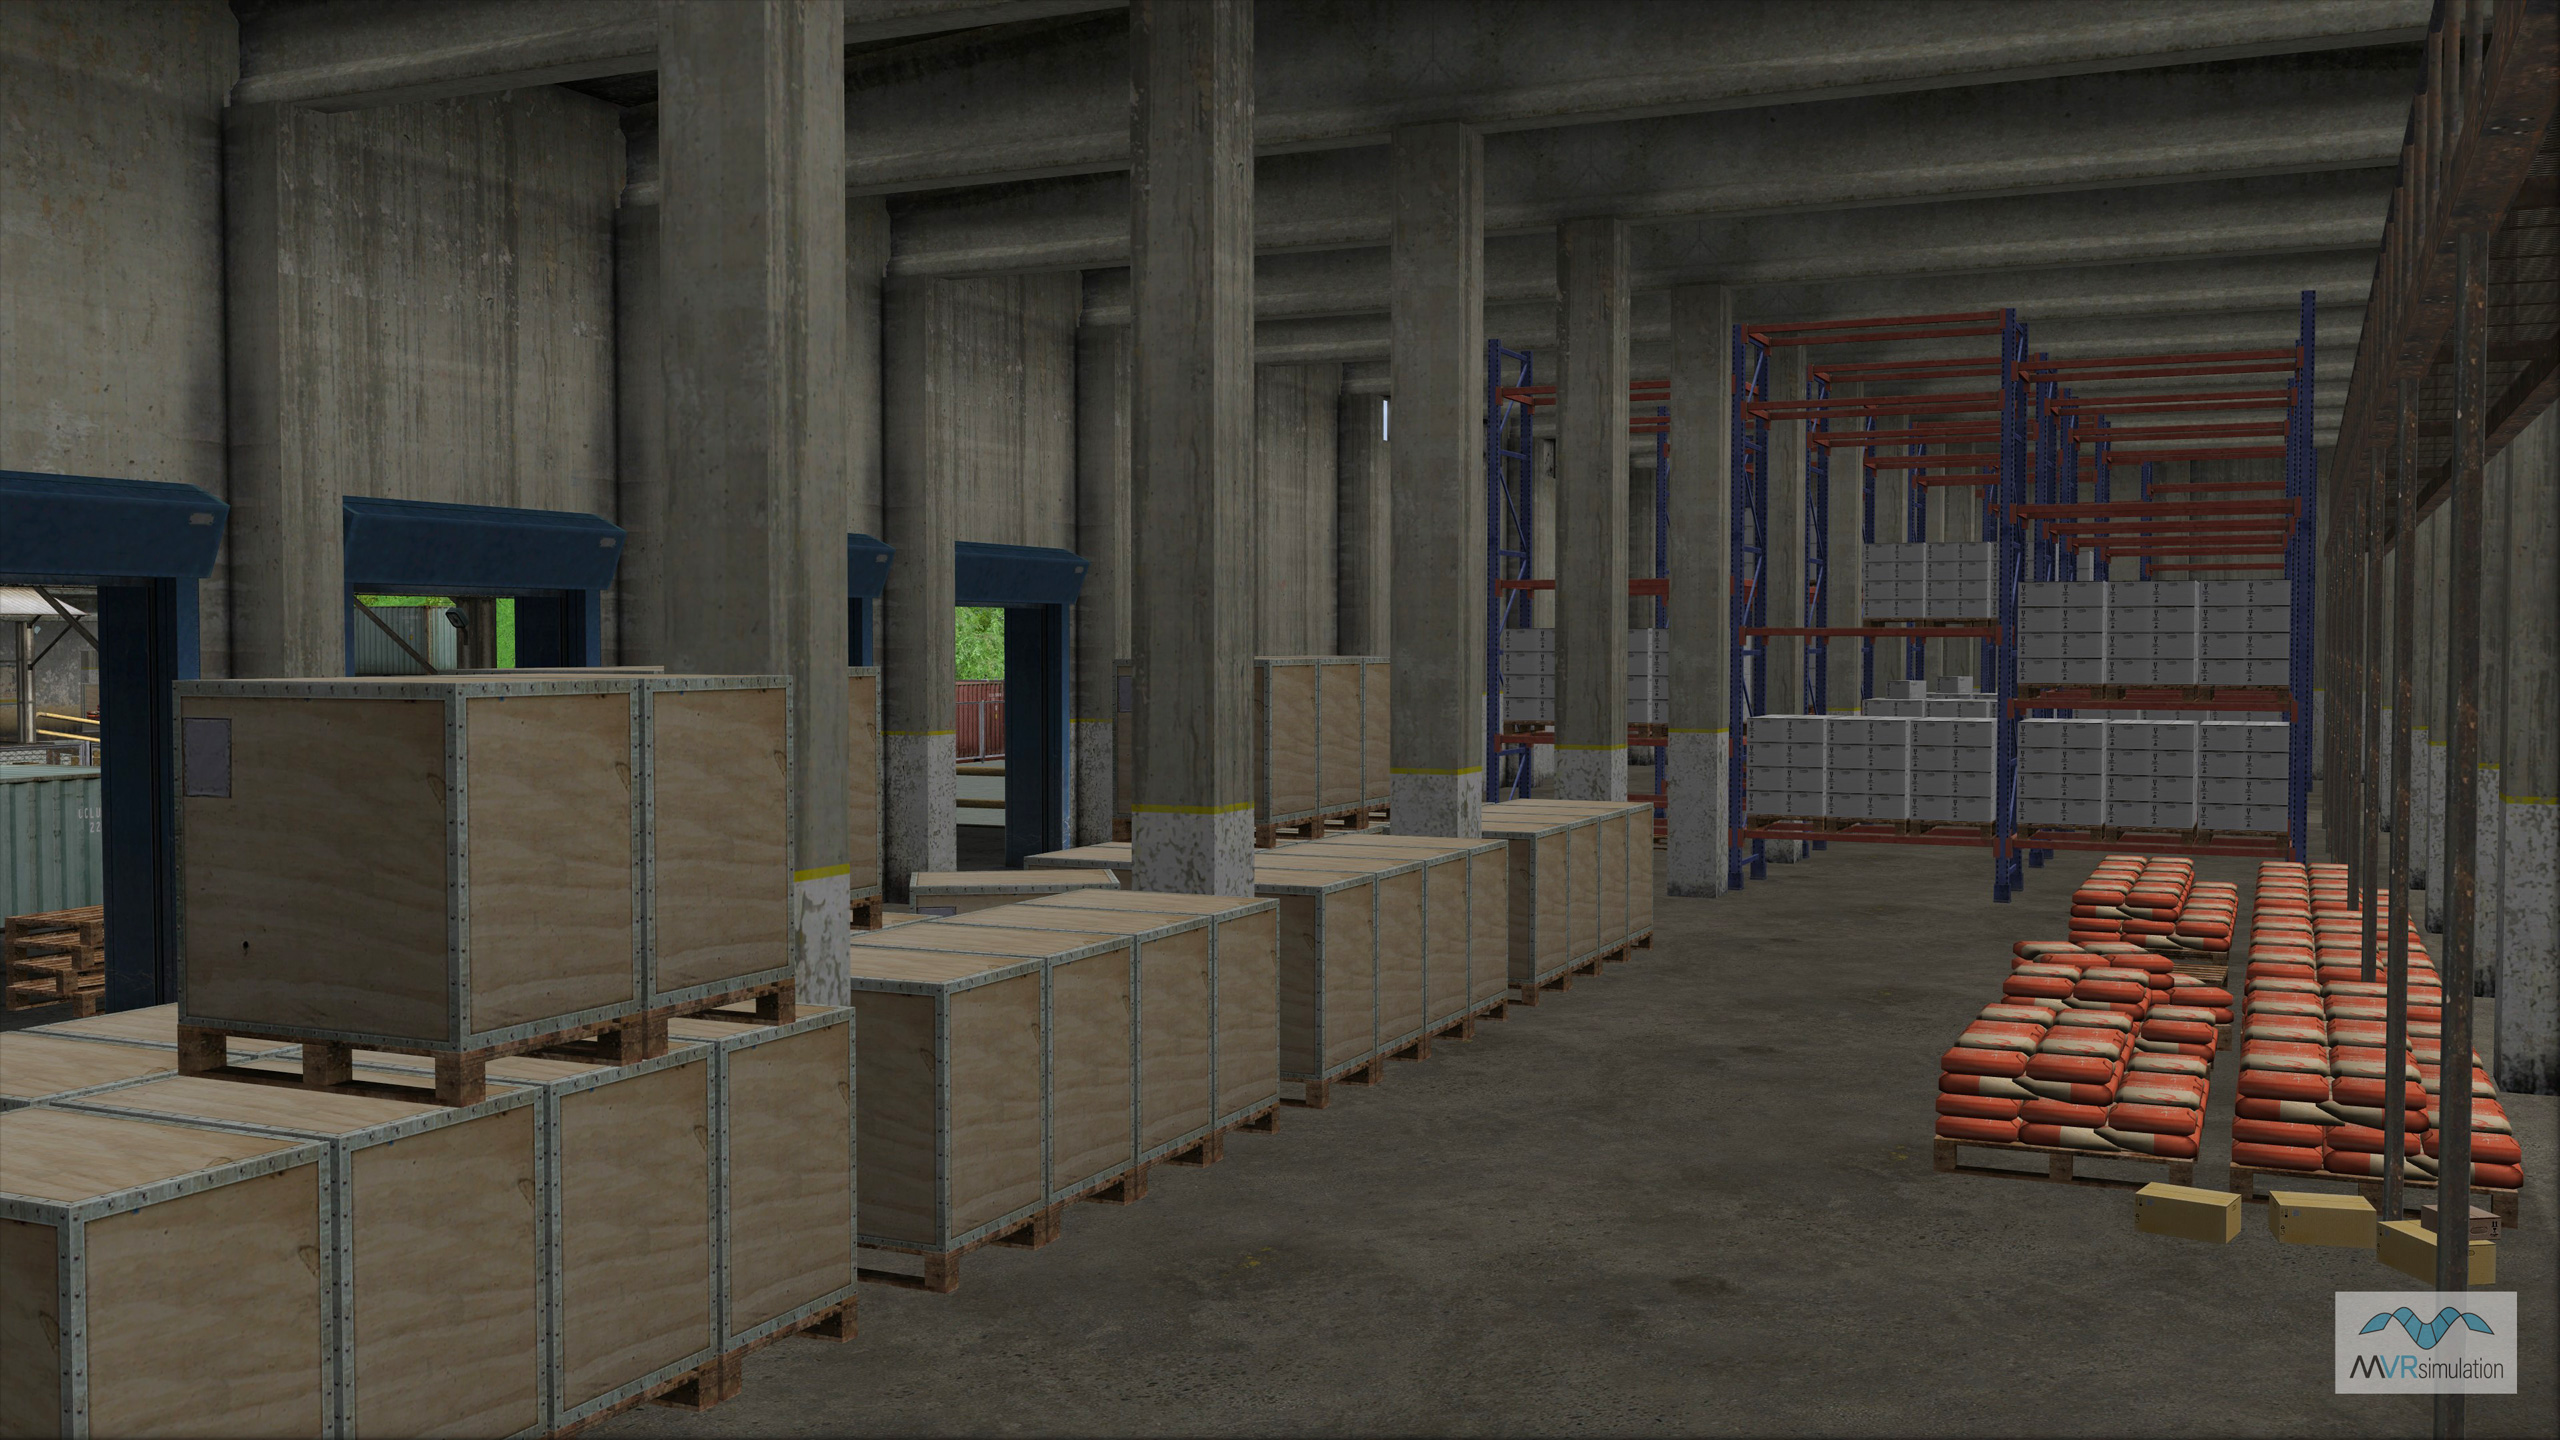
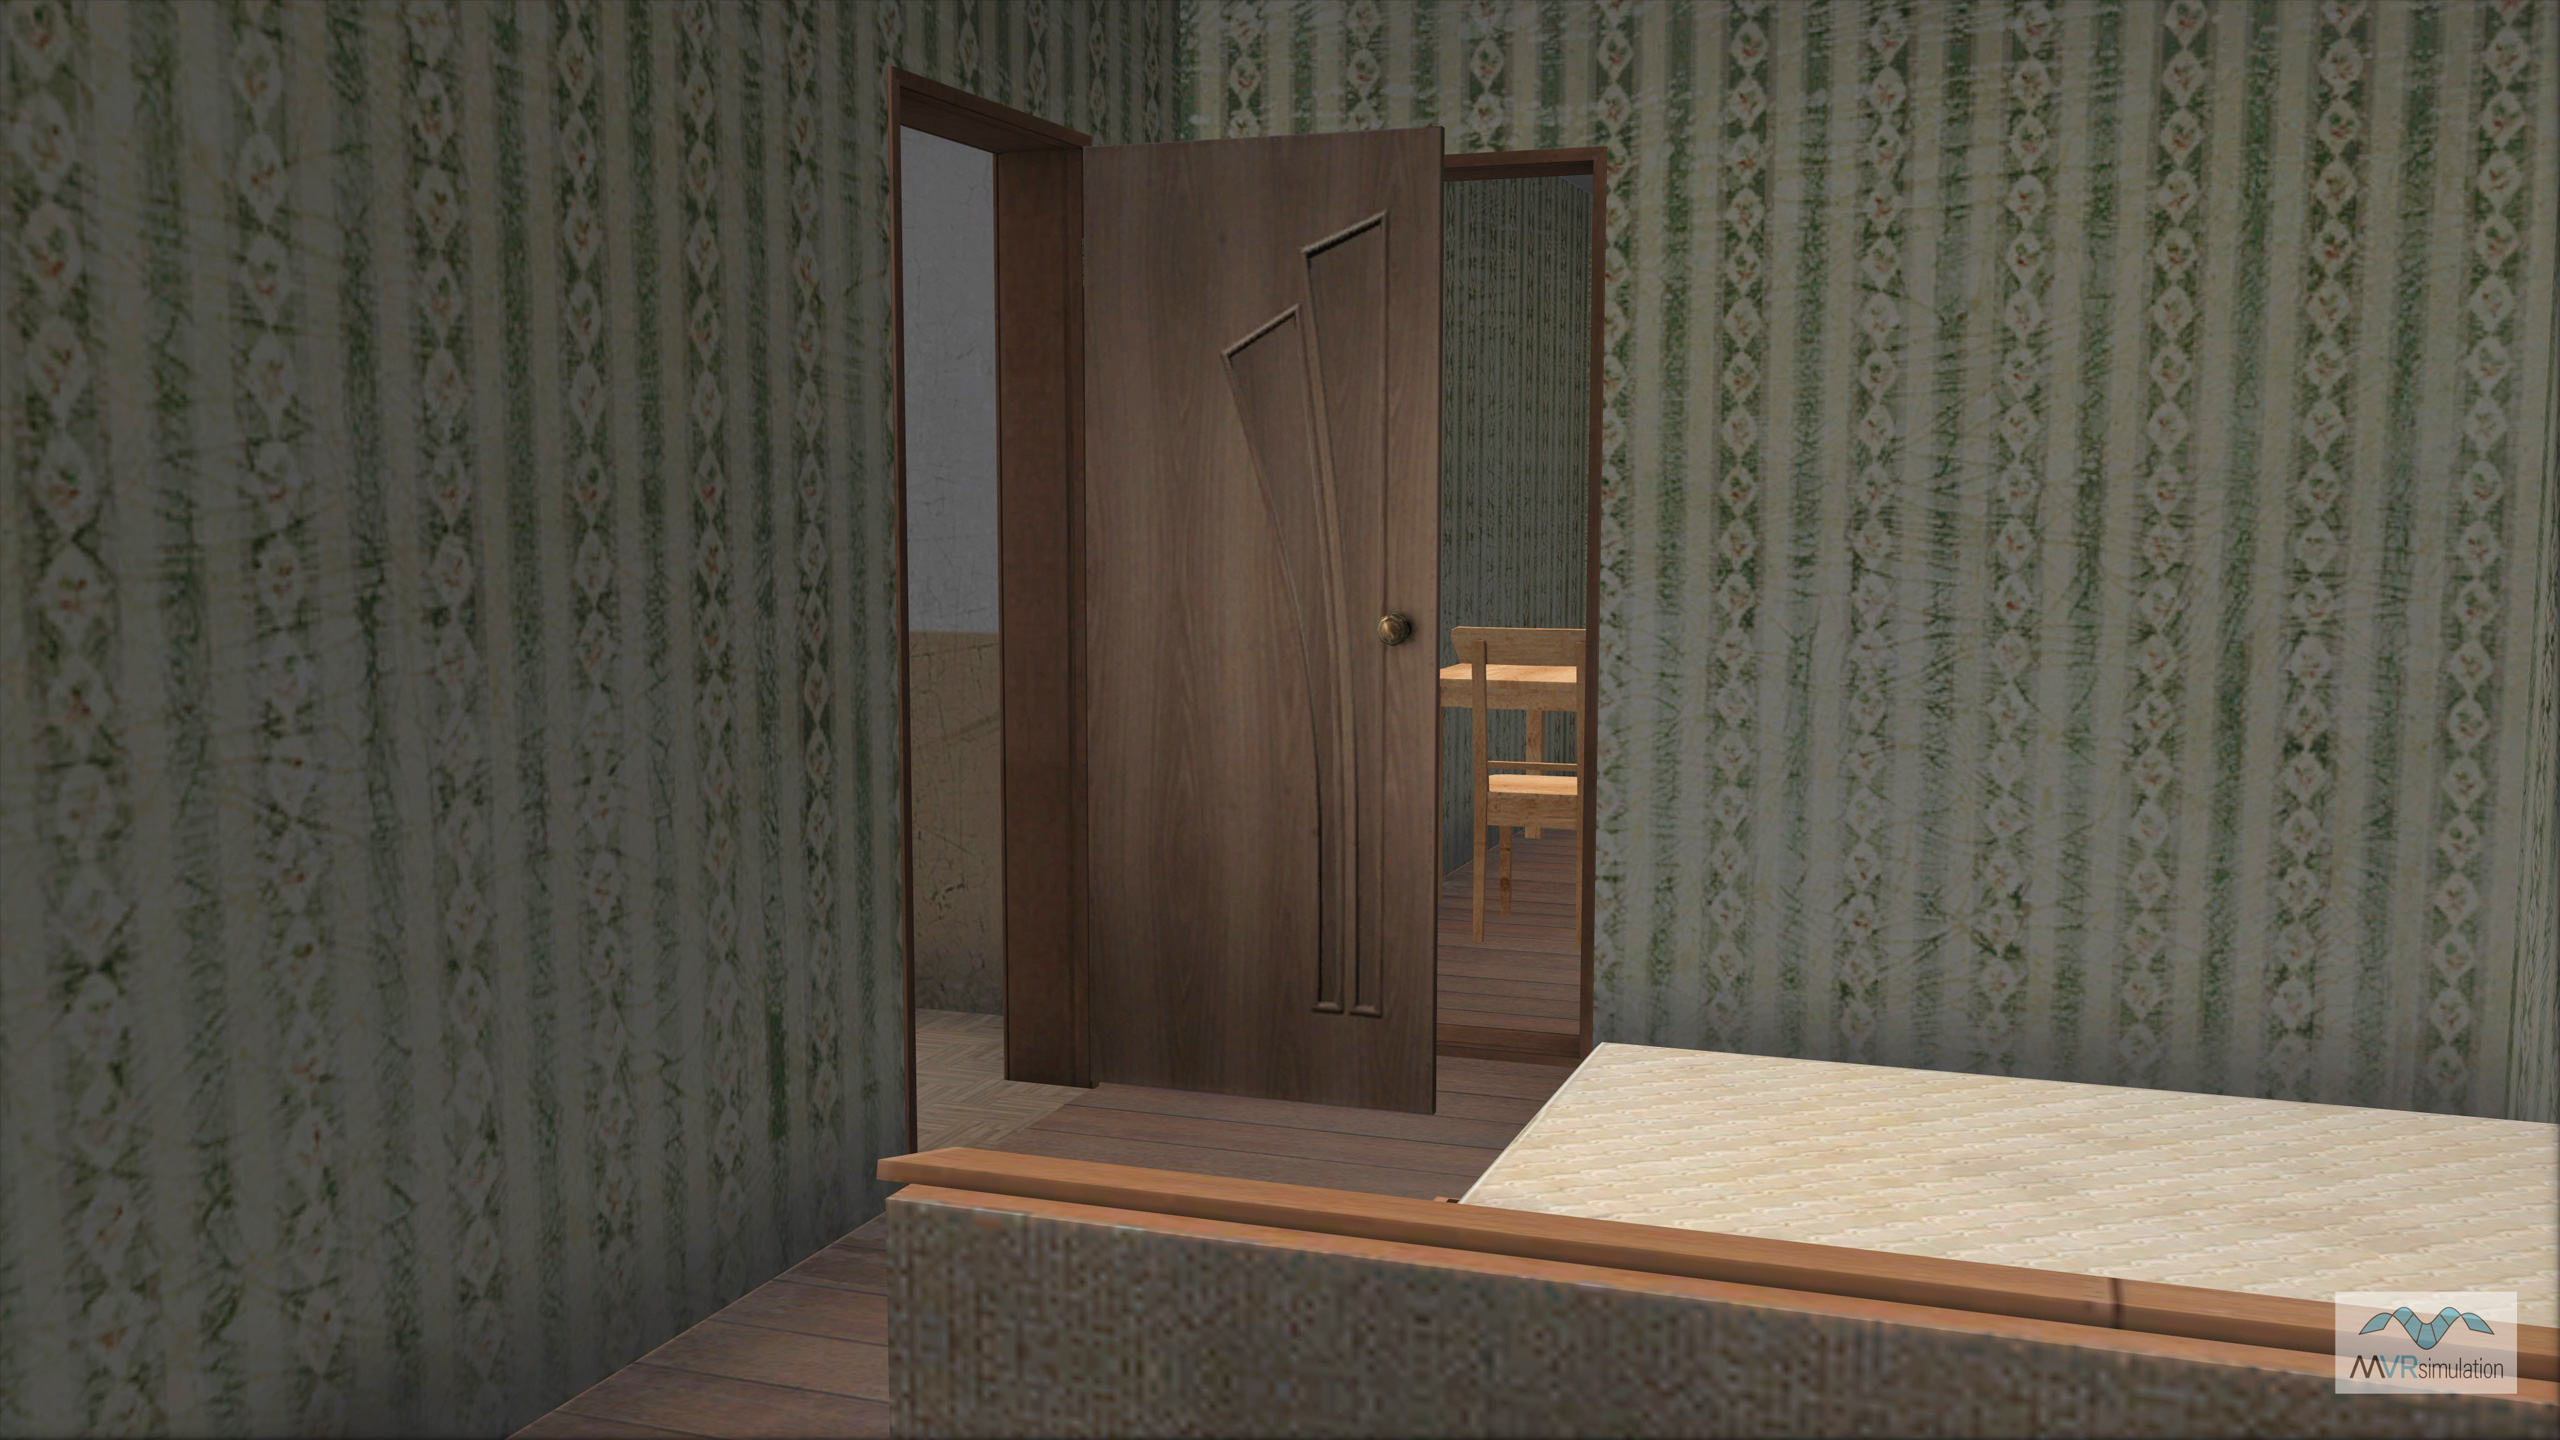
Urban Interiors
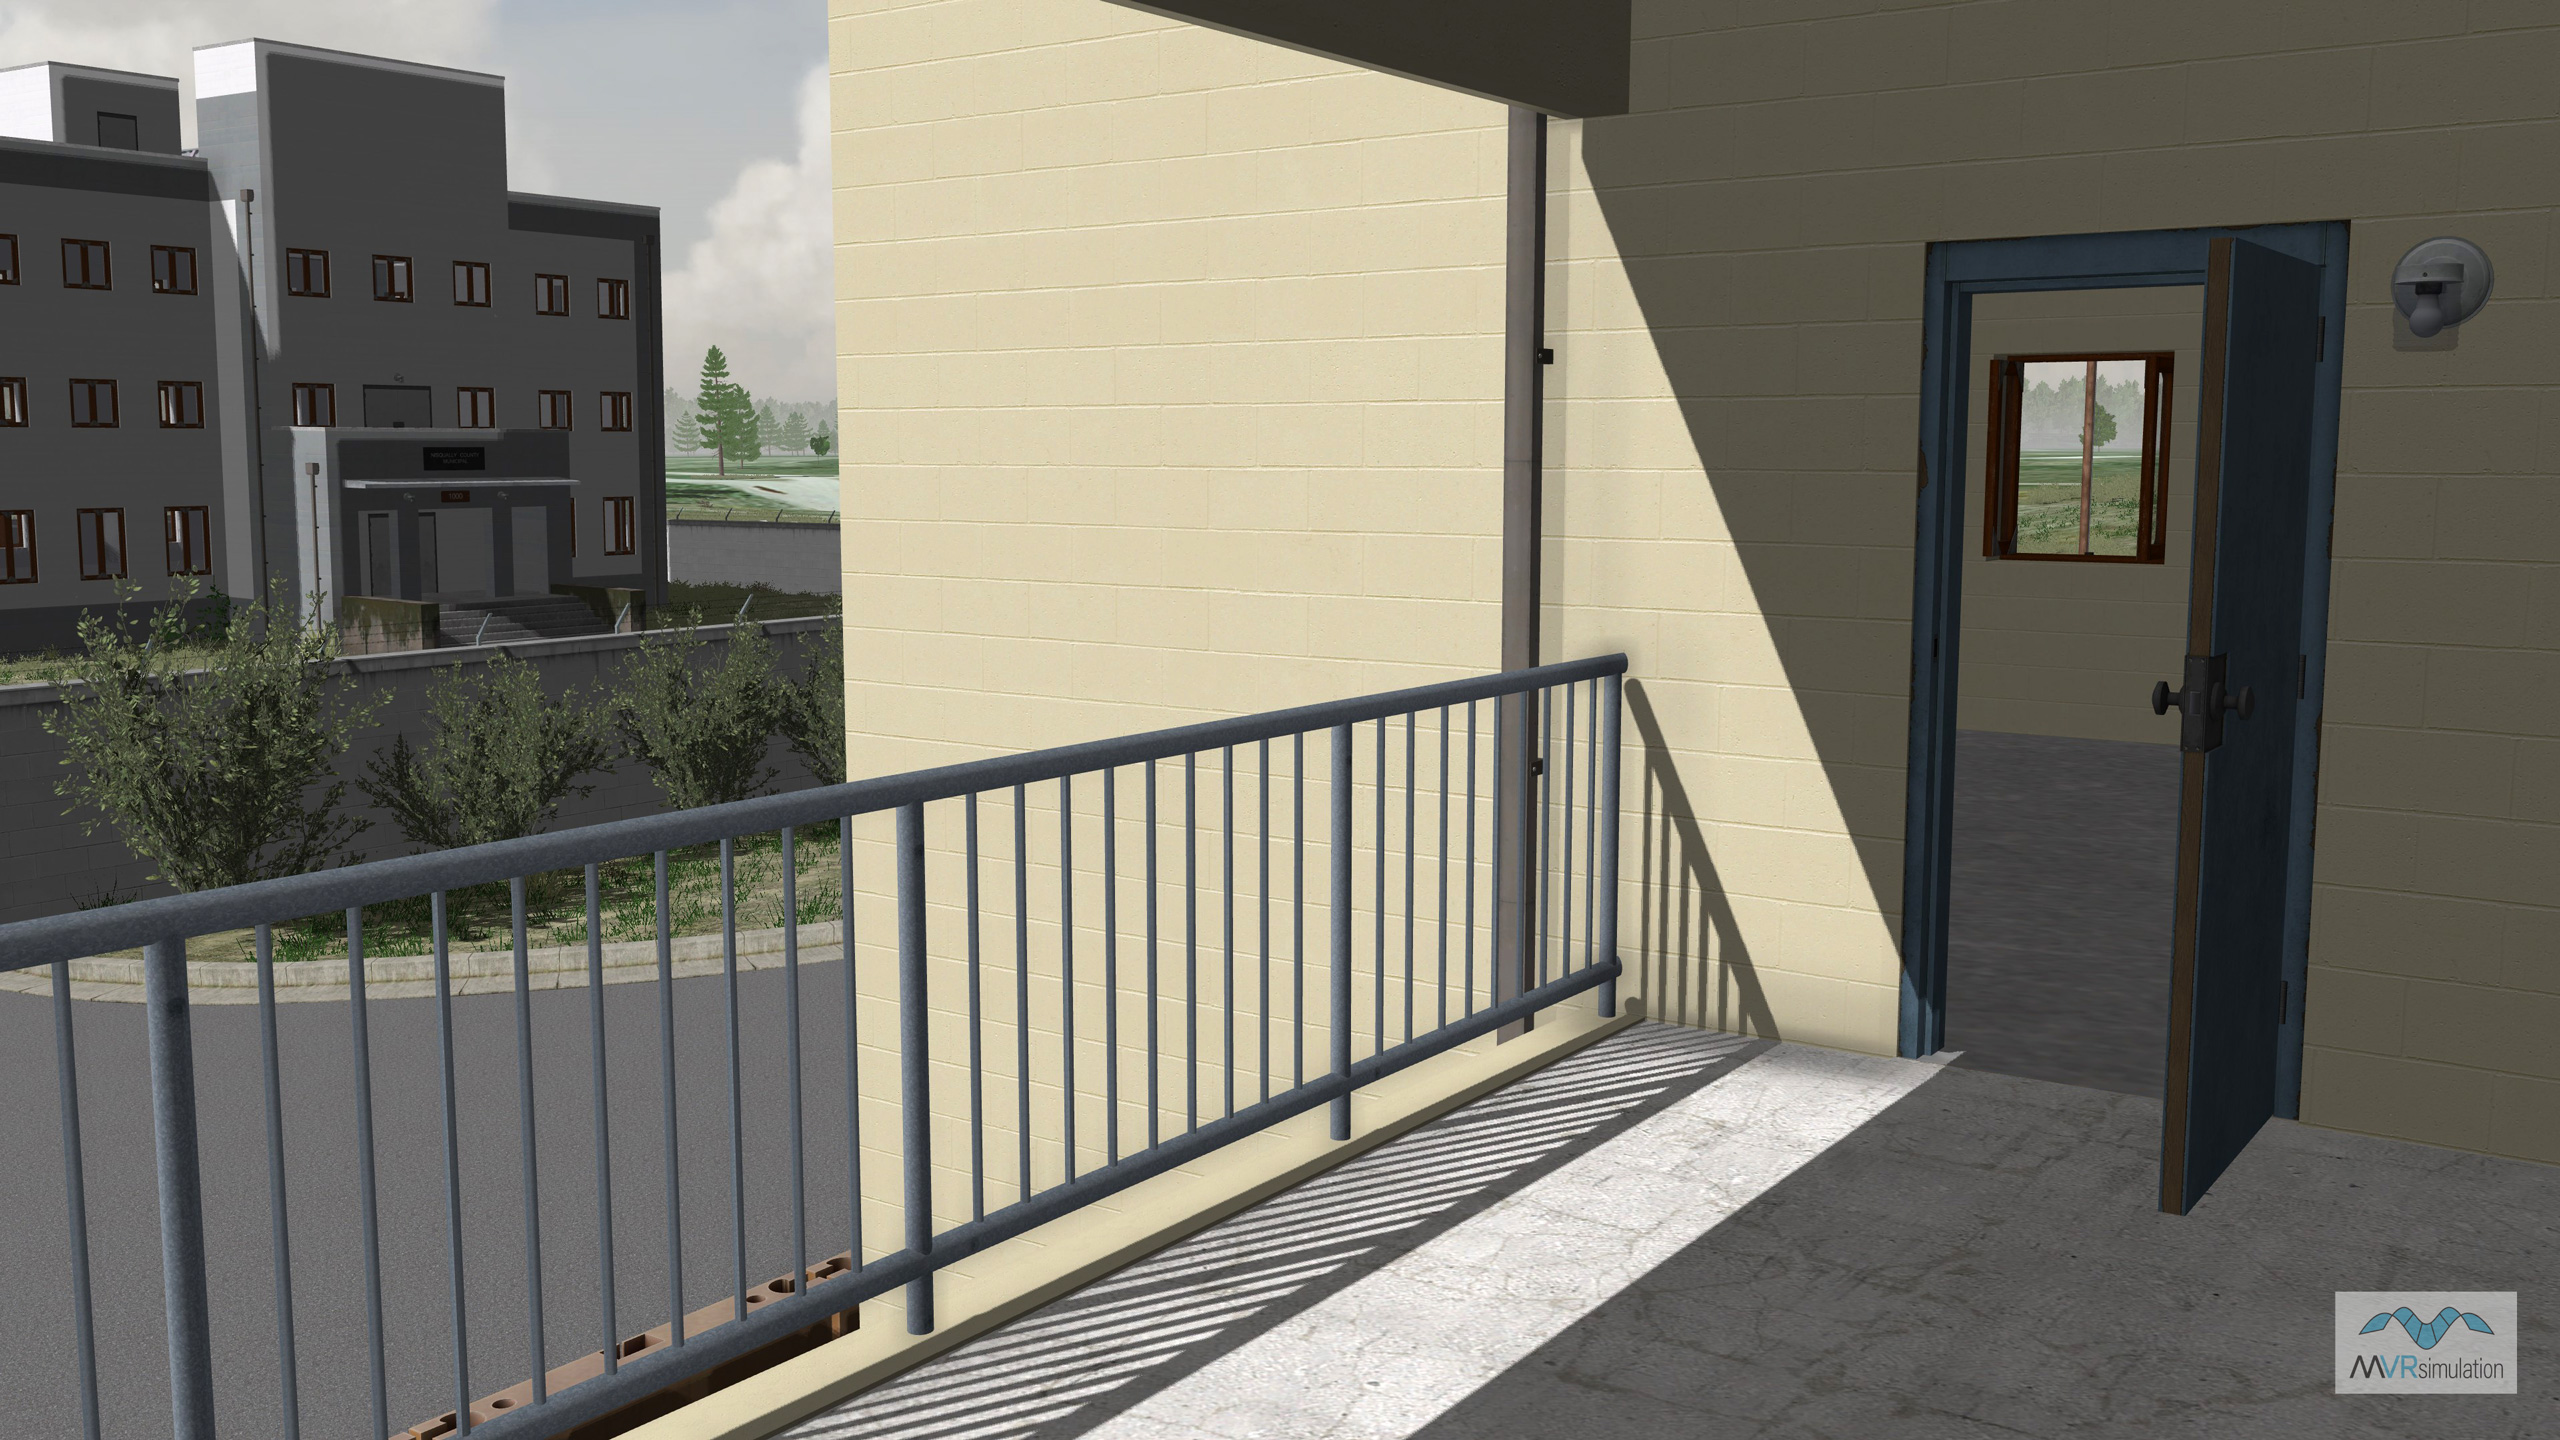
To facilitate training scenarios that take place inside buildings, MVRsimulation has modeled interiors in many of the buildings on its virtual urban training 3D terrain datasets. In such scenarios, VRSG can be integrated in a mixed-reality environment with headsets and weapons sensors.
Modeled features to support shoot house type activities include windows and doors that open and shut, internal and external stairways on multi-level structures, and rooftop access. Many structures also contain balconies, footbridges, and other features that support multiple ways of egress.

Inspecting the final model
When the model is complete, we export the model in FBX format, and then convert it to MVRsimulation's model format file. (Tools for converting models in FBX and OpenFlight formats to MVRsimulation's model format are delivered with VRSG.) We view the model in the Model Viewer and then render it in VRSG. We inspect the model's switch states, material settings and artifacts in the geometry and make any needed corrections. Finally, the model is reviewed by other members of MVRsimulation staff, and any necessary corrections or refinements are made.
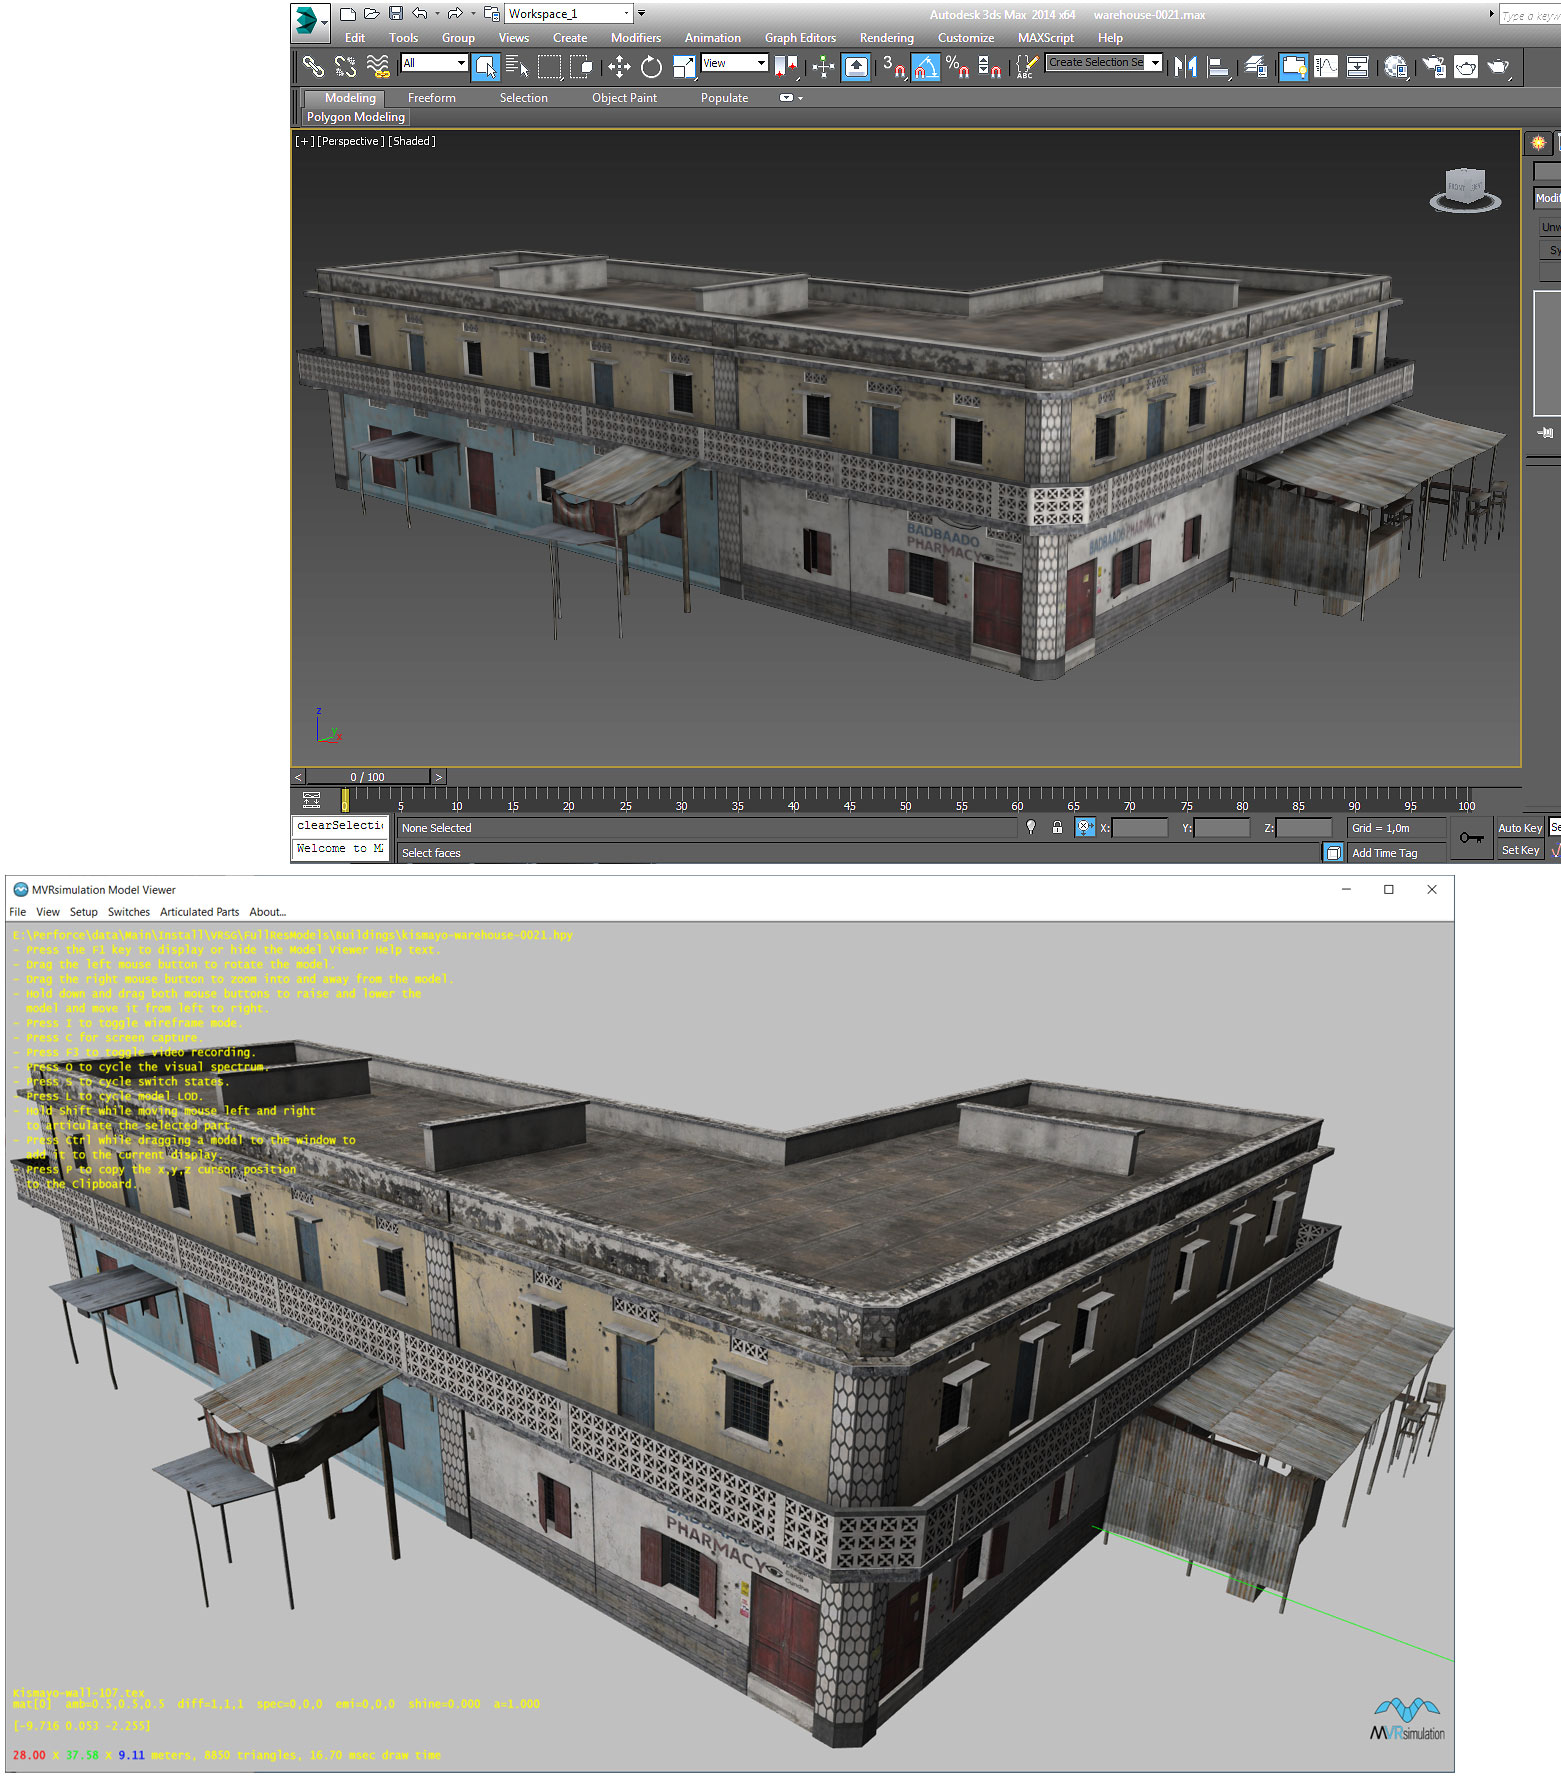
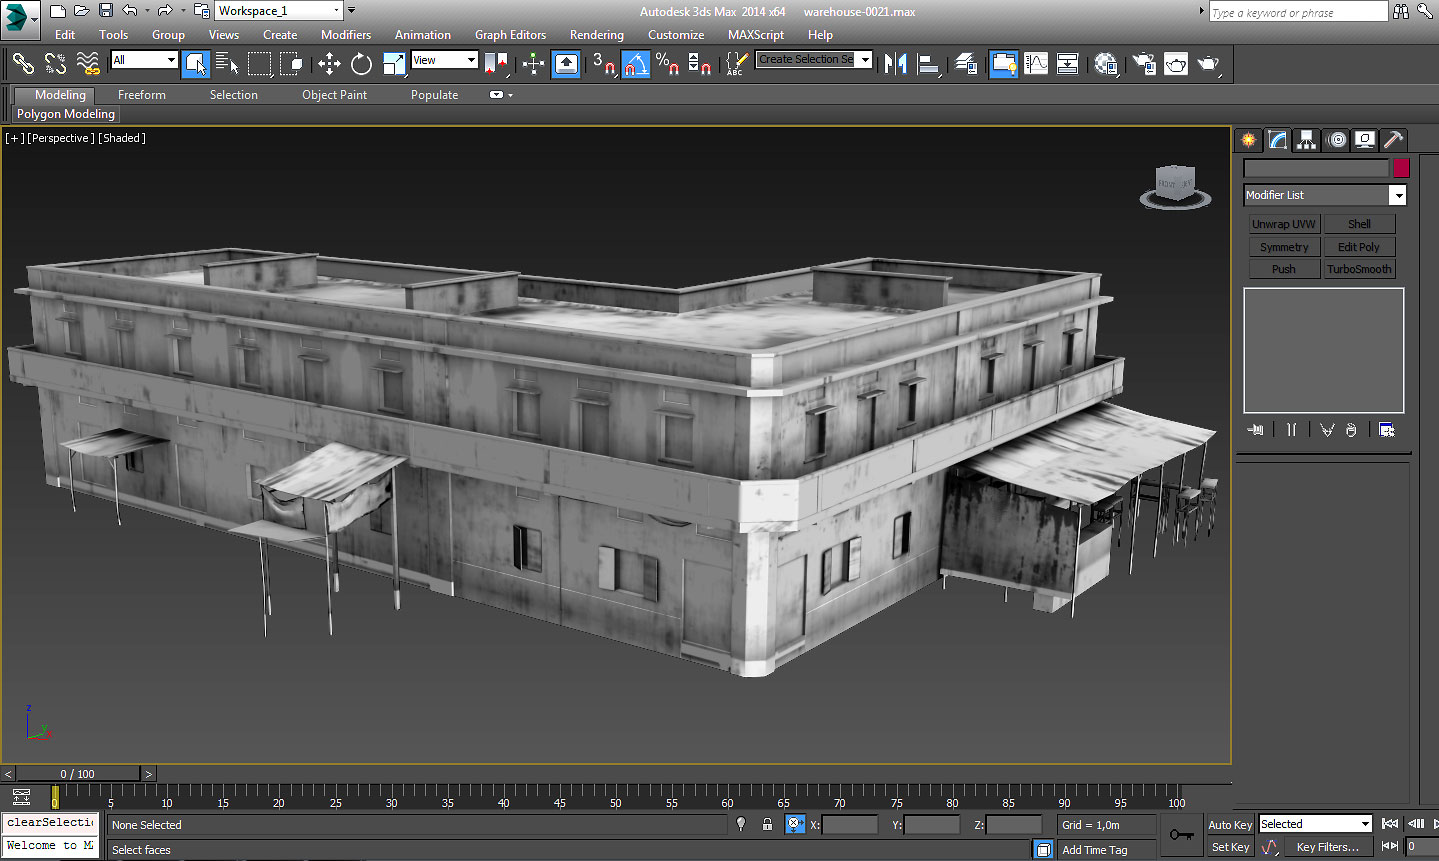
The Kismayo-warehouse-0021 model in Autodesk 3ds Max and in MVRsimulation's Model Viewer.
By default, VRSG's IR rendering of a model is achieved by a terrain database’s material configuration file. For VRSG's physics-based IR simulation, you assign a physically based coefficient for each diffusion texture (wood, stone, metal, and so on) in the database. For models that have parts requiring specific thermal responses during simulation (such as MVRsimulation's military vehicle models) separate IR textures are created for the model.